fastai v2 walk-thru #2
Chapters
0:03:7 Pipeline Functions
4:3 Decode from Pipeline
6:50 Transform Data Source
12:48 Data Sauce
31:23 Get Files
38:44 Functions That Return Functions
39:58 Creating Splits
42:2 Labeling
48:58 Category Map
53:30 Merge Conflicts
68:27 Did Swift Ai Influence the Design of V2
79:15 Delegates Decorator
81:53 Contexts
83:56 Documentation
Transcript
Okay, hi everybody, can you see me, hear me okay? Okay, this will be an interesting experiment. And everybody in the forum looks okay, great. And I am recording, so that's good too. So I'm going to go back to SDI dev, dev. We were looking at, wait. All right, so we need to make sure we get Paul.
As we're always changing stuff. And restart. Okay, so where we're up to is we learn how to create basically a function. But actually something that derives from transform. But it just, it looks exactly like a function. So you pass it an argument. Transform will send that off to the encodes method.
Kind of like how nn.module in PyTorch passes it off to a forward method. And it will calculate the result of the function and return it. And then we also learned that something which works that way. You can also optionally add a decodes. Which will, basically something that you undo that transform.
Or at least enough that you can display it. And so that has to return something which has a show method. But that's just a function basically. And then we learned that you can pipeline functions. Which basically just means that you are composing functions together. Or transforms. And the interesting thing in this one is that when you return a tuple.
It will. Then let you, things after that. You can make them tuple transforms. And it will apply the function only to those items in the tuple individually. That are of this requested type. I think we have one unnecessary annotation here. Let me check. Yep. Okay. So. Yes. You can decode from pipeline.
That's kind of the whole point really. Is that a pipeline that encodes can also decode. So you can see here. For instance. So we could go. T equals pipe zero. And so there's T. Which is a tuple with a boolean and a tensor. Make sure I've already called that one.
Oh, sorry. They're doing Siamese. So it's two images and a bool. So we could say. Decoded T equals pipe dot decode. T. And. There it is. And so now. That is. Let's see. Pipe dot decode. So that's going to. Actually, none of these have a decode in them. So that's a pretty boring example.
Let's go back to the previous one. Oh, that's not a pipeline. We'll come back to it. We'll see one later. But basically, yeah. So none of these have a decode. We don't have to decode Siamese image. Siamese image tuples. But yes, if you say pipe dot decode. Then it will.
Pipeline through all of the steps. Calling decode on each. And actually. Pipe dot show. Is an interesting one. Because to show a pipeline. It's going to. Decode every part of the tuple. Because normally the last step is a tuple. And it will keep decoding it. But it'll stop. As soon as it gets to a type.
Which has a show method defined. So. In this case actually. The output type of pipe is a Siamese image. And the Siamese image has a show method defined. So when we call dot show. It doesn't really need to decode at all. But for other types it does need to decode.
So then transform data source. Is something where we give it. Arrays of transforms or functions. Each one will be turned into a pipeline. And each one of those pipelines. Will be applied to each item. And that will then give us a tuple. Which was not working yesterday. But is working now.
So you can see. Actually this is a good example of decode. Like a. Sorry. Transformed data set. Can decode. And what that's going to do. Is it's going to take. Our. Cario image and our number. And it's going to decode each part of the tuple. By decoding each of the pipelines.
And then you end up with as you see. The correct name in this case of the pet breed. And so show again will decode. Each part of that tuple up into the point where it finds a show method. And then it will show it. Ah now I don't think.
We got as far as TwfmDL yesterday. No I guess we couldn't have because. It wasn't working. So TwfmDL is a data loader. Which understands. Fast AI version 2 stuff. And specifically it understands two pieces of stuff. One is that it understands how to maintain types. So if it makes sure that.
You know transform or pillow image subtypes are maintained. And it understands decoding. So basically it's it lets you have transforms in a transform data loader. And they will behave the same way as transformed in a transform data set. So here. What we're going to do is we're going to do the same thing we had before.
Let's just copy it down so we remember. So this was how we did pets. Last time. So previously our first pipeline was image dot create resize to tensor byte float tensor. And our second pipeline was labeler and categorize. And just to remind you labeler was a regex labeler function.
This time the labeling pipeline is the same. But the image pipeline is just PIO image dot create. So what's PIO image. PIO image is simply a. It is. Oh yeah here it is. Is this. It's one line of code. And it's just a thing that inherits from PIO base.
And PIO base. Is something which inherits from PIO image. And there's a bit more information than we need here but the key thing to recognize about this is that it has a create method and a show method. Which are the things that we need for it to be able to work in our transform pipelines.
And the create is static. So PIO image dot create is simply going to call load image which is the thing that opens the PIO image in the usual way. Okay so that's that. So why are we able to get rid of all of these things from our image pipeline.
And the reason is that we've moved them into our data loader transformation pipeline. Which is going to turn out to be pretty handy in this case it doesn't make much of a difference but basically what's going to happen now is we'll learn a bit more about the data loaders today.
But basically the data loaders also have places you can add transform pipelines and in this case after creating the data set it's going to call these on inside the actual data loader itself. One thing to recognize is that image resize and byte to float tensor don't make sense for categories.
But that's okay because image resizer only defines encodes for PIO image and PIO mask. It doesn't define them for anything else so it'll just ignore the categories. And byte to float tensor is the same. It's defined on tensor image encodes and tensor mask encodes and nothing else. So it won't change our categories.
So that is why that works. So there it is. So the last kind of piece of this part of the API is data source and so each thing is going to build on each other thing. So data source is basically a transformed data set but with the ability to create separate training and validation sets and in fact to create as many subsets as you like.
So if you're having trouble with code not running, best place to ask is on the forum because I can't debug it while we go, but feel free to ask on the forum. So what we're going to do now is we're going to use this thing that looks a lot like a TwfimDs, a transformed data source, but it's going to allow us to separate training and validation sets.
And so if you look at how TwfimDs was defined, here it is here. So when we created our TwfimDs we passed in items and transforms. This time we're going to pass in items and transforms and the indices of our splits. So remember split_idx was something with two arrays in it and the arrays just had lists of IDs for the training validation set.
So by passing the data source this extra piece of information, we'll end up with something that you can use exactly the same way as TwfimDs. So you can still just ask for an element from it. So this is kind of a superset of the functionality of TwfimDs. But you can also ask for a subset.
So the zeroth subset will be all the things that were in split_idx and the first subset will be all the things in split_idx. So in other words, pets.subset is the validation set. And so there is indeed a shortcut for that, which is pets.valid. So you'll find that there is a pets.valid.
Hi Joseph, just to remind you again, if you have bugs in the code, please ask on the forums, not on the live chat, because I won't be able to answer them here. So the validation set, for example, and the training set, for example. And so pets.valid is exactly the same as pets.subset, and the training set is exactly the same as pets.subset.
So one of the nice things here is that we're not just limited to just a train set and a validation set. You can actually have as many data sets as you like. You can have multiple validation sets, you can include a test set, and so forth. So it's kind of a bit more flexible here than fast.aiv1.
OK, so now we've got something, so basically these training and validation sets act pretty much exactly like a tfmds. The type is something, is in fact a tfmds, as you can see, so that makes it nice and easy. All right, so because these things are just tfmds, you can decode them just like before, as you can see.
And yeah, we can show them just like before. So here is something even more interesting, which is, we've seen already tfmdl after item. That's going to run, that's going to be a transform that runs on each individual tuple that comes out of the transform pipelines. But then there's another one called after batch, and that's going to run after the tuples have been collated together by the PyTorch data loader into a single batch.
And what that means is that we can put transforms in here that we can run on a whole batch at a time, and that means we have the ability to easily run GPU transforms. So in this case, the most obvious GPU transform to do, of course, or the most obvious batch transform to do is CUDA, which will simply move it onto the GPU if you have one.
And then we can convert it from byte to float on the GPU. Now that might seem like a pretty minor thing, but actually converting a byte to a float is really slow for two reasons. The first is that floats are much bigger than bytes, so it's taking up a lot of memory to transfer it to your GPU as floats.
And the second is that converting from a byte to a float actually takes a non-trivial amount of time on the CPU. It actually does take up quite a lot of time. So here's the first example of something that was very, very hard to do before, which is to actually do computation on the GPU.
And the nice thing is that the GPU transforms often don't even need to be written in a different way. If you look at a float tensor, for instance, you can see that "encodes" simply goes "o.float/255". So thanks to broadcast tensor computations and stuff, we don't normally have to write it at all differently to make it work at a batch level.
So often you'll be able to just transparently move your transformations onto the GPU, and suddenly things will just run much faster. So I think that's one of the pretty exciting things here. So now we're getting pretty close to having something which looks like what you would actually train with.
It's something which is categorizing our pet types. We have separate training and validation sets. It's converting them into batches, and we can even go "train_dl.show_batch" and it will actually give us a full set of these. So this is kind of really getting everything together nicely. One of the very neat subtleties of DataSource is that DataSource - well, it's not really DataSource, it's really Categorize.
So we're using Categorize here, and what happens - we'll learn more about this shortly - but what happens when Pipeline first gets its DataSource is it calls a special method in a transform called "setup", if you have one. And you can see here that what we actually do is we try to grab, if there is one, the "training" subset of the DataSource.
So one of the cool things here is that automatically this stuff will ensure that your Categorize vocab is only done on the "training" set. So these are the kind of things that are very easy to mess up. So the questions here - does "byteToFloat" normalize? No it doesn't. As you'll see, there is a separate "normalize" function, however it does have an optional "div" argument which will divide it by 255, so that'll give you between 0 and 1, so not quite normalized, but at least it's on the right track.
But yeah, there's also, as we'll see later, a "normalize" transform. Text transformations are rarely done lazily, they're normally done once pre-processing style, so they're not generally a great - so kind of such a good match for the GPU. But if there are - there's nothing to stop you from doing text transformations on the GPU.
But as you'll see, we've actually - text transformations are a lot faster now anyway. And then, "any reason we don't do all transforms on GPU?" Yes, there is, Molly. The issue is basically - and that's a great question - the issue is basically, have a look here. If you want to be able to easily process things on the GPU, then you need a batch.
And if you have a batch, that means you need a tensor, and if you have a tensor, that means that all of the items in the batch have to have the same shape. So if we didn't have this image resizer here, then the images would all be different shapes, and so we wouldn't be able to collate them into a batch.
So specifically, the things that you probably want to do on the CPU are load the JPEG, in some way make sure that all of the things are the same size, and then convert them into a tensor. So those are basically the three things you have to do, at least for vision on the CPU.
Having said that, there is a project by NVIDIA called DALI, which we'll endeavor to provide some support for, as once it stabilizes a bit, it's still pre-release. And they've actually written the custom codec kernels to do stuff on things that aren't all the same size, so there might be possibilities to do some stuff there.
So images can absolutely be rectangular, it doesn't have to be 128x128, we'll see more of that later. And hopefully I've already answered the question about what's best on the GPU, I would say everything on the GPU that you can. So I would say try to do everything on the GPU that you can, but specifically, turning everything into something of the same size so that they can be plated into a batch has to happen before it goes on the GPU, so that would be my rule of thumb.
So let's look at another example. There's no new things I'm going to show you, I'm just going to show you another example, which is segmentation. So let's grab a subset of Canvid, get those image files, create a random splitter, create the split indexes, create the labeling function. So the transforms are basically the same as we had before, except that for the Y we first of all call cvLabel, so that's the thing that's going to grab the name of the mask file from the image file, and then we're going to call pilMask.create, and pilMask, as you can see, is just a single line of code, and really the only reason it exists, or the main reason exists is so that we can do stuff like we did back here, where we had separate encodes for images and masks.
So by giving things different types, it allows us to give different functionality. In this case it ensures that when we resize things, we're going to use nearest neighbors instead of bilinear. So that's a pretty interesting trick, and so as you can see, the amount of code necessary to do segmentation, even though we haven't got any data blocks API yet, is pretty tiny.
So the idea here, and it all looks almost identical to PETS, even though it's a very very different task. In fact, even things like the DL transforms are literally identical, so we didn't have to redefine them. So the idea of this intermediate API, that's halfway between data blocks and the lowest level stuff, is to make it super simple, to make it really easy to do custom stuff, and my guess is that people doing a lot of Kaggle competitions, or more advanced stuff that's a little bit different to the things we show in the lessons or whatever, is that you'll probably use this level of the API a lot, because it just doesn't require much thinking and it's all pretty transparent and easy to understand.
And then, as you'll see, the stuff that is in data blocks and stuff is all built on top of this and takes very little code. So Jacob asks how to profile code to see where the bottlenecks are. I'd have to say I'm not terribly good at that, or at least I'm not terribly smart about it.
If I want to know where bottlenecks are in training, I'll just check htop to see if all the CPUs are being used 100%, and I'll check NVIDIA_SMI to see if my GPUs are being used 100%. So if you haven't done that before, you basically go NVIDIA_SMI_DEMON, and it starts spitting out stuff like this.
And the key column that you're going to care about is this one here, SM. When you're training something, that should be basically saying above 90, and preferably around 100 all the time. That means your GPUs are being well used. If it's less than that, then it probably means that your CPUs are being overtaxed.
And so that would be kind of step one, and if it's then your CPUs are overtaxed, then you can just use the normal Python profilers to find out why. If your GPU is being overtaxed, then that's probably just basically a good thing. It's using your GPUs effectively most of the time.
Okay, so that's 08. So I thought from here, maybe we'll take a look at tifmdl, which is in 05. And by the way, there's a file called local_notebook_index.txt, which is automatically generated, which tells you which notebook everything's in, although the easier way to quickly jump there is you can just go, let's just import some local_notebook_show.inputs there.
You can go source_link tifmdl, and as you can see, you'll get a link. Straight there! And as you can see, it's got an anchor, so it's going to jump straight to this right section once we wait. There we go. Okay, so that's a nice, fast way to go to the right notebook on the right part of a notebook.
That was source_link. Okay, so here is 05.data_core, and we may as well look at the whole thing from the top while we're here. So basically, what we're going to learn is how get_files works, and get_image_files, get_splitter, get_labeler, get_categorize, get_multi_categorize, and then we'll put all that together with mnist, and then we'll see tifmdl.
Okay, so let's start. So as you can see here, the first bits are kind of three major data-box-ish components, get_splitter and label. So the basic get thing we use, same as in Fast.ai version 1, is get_files. So get_files is going to take one, two, three, four parameters, the path that we're going to look for files in, which extensions to look for, whether we want to do it recursively, and whether there's just some subset of folders to include.
So we have, in this notebook, we're using mnist, and so it's important to know here that this notebook is not just a tutorial notebook, this is a notebook that actually defines the module called data.core. So we're going to end up with something called data.core. Okay so this is the thing that we're building.
You can see we've got get_image_files, get_files, and so forth. You'll notice that it's automatically creating a thunderall array, so that's created automatically by the Fast.ai notebook functionality. This is the thing that Python uses to decide what to import, if you say import *. In most Python libraries, people don't bother creating this, and that's one of the reasons that people normally say don't use import *, is because if you don't bother to create this and it's actually going to import also everything that is imported recursively, it gets really awful.
But since we're super careful about what gets exported and how things are structured, you'll very rarely have problems if you use import *, so we try to make it as kind of REPL-friendly, interactive-friendly as possible. And so particularly because this is created automatically, it's a really, really handy thing.
So that's why you'll see it in the Python module, but you won't see it in the notebook because it's automatic. So yeah, so this is kind of our first deep dive into literate programming, because we're actually building the data.core module, but as you can see, we have pros along the way.
So the first step is to get a list of items, and an item is, can be kind of anything you like. An item list can be anything you like. So for stuff with vision, it's normally a list of paths, but an item list could be a data frame, could be a connection to a database, could be a network, pipe, as you see, you'll be able to do pretty much anything.
But for now, for these ones, we're going to be using paths, and we'll be looking at using data frames later. So we grab our path, we're going to be, so get_files is going to be calling _get_files, so that's what this is, and you'll see _get_files, if we search for it here, _get_files, it did not appear in Thunderall, and the reason for that is that by default, anything that starts with an underscore is not exported by Fast.ai.
Okay, so this is just a little function that will, let's see, we're being passed a bunch of files to look at, and so we're just going to turn them into pathlib.path objects. We don't include things that start with dot, because we're hidden. We also make sure that the extension appears in the extensions list, or that you didn't include an extension list, because if you didn't include an extension list, it means we don't care.
Then get_files, the key thing is to understand how os.walk works, which we briefly mentioned in the Fast.ai courses, so look it up if you want some details, but basically os.walk is a ridiculously fast Python API for very, very, very rapidly looking for things on your file system, and get_files, we spent a lot of time optimizing this, and get_files can run on the entirety of ImageNet to grab, you know, all 1.3 million files in just a few seconds, I think it was like 8 seconds or something.
There's no limit on how many files that can be, except of course the memory on your computer. So remember then that the way we kind of demonstrate functionality in the documentation is generally through tests. So the test here is we're going to grab all of the png files in train/3, in mnist, and in 3, and in 7, in the mnist sample that's the entirety of the images that we have, so we'll do things like make sure that the number of images in the parent when you use recursion is equal to both of the child children, stuff like that.
And then we also just print out a few examples, and as you can see like most things in Fast.ai, we're getting back a capital L, an L object, so you can see how big it is, and it shows you a subset of some of the paths that are in it.
So sometimes we kind of have additional checks that probably aren't that interesting for documentation purposes, but are just useful as tests, and when that happens we add #hide to the top of our cell, and that'll cause it not to be included in the docs. So let's have a look, dev.fast.ai, data, core, so if we have a look at files, so you can see here's the output, the html output of what we were just seeing, this is the most general way, blah blah blah, this is the most general way, blah blah blah, ok, and you can see that the first set of tests and stuff is shown here, the output is shown here, but the #hide version is not shown.
Ok, as we've discussed before, in order to kind of easily get partial functions, we sometimes define things which, that's a bit smaller, we sometimes define functions that return functions, so here's a nice easy way to say, oh, this is going to create a function that non-recursively searches all png files, for instance.
So then its behavior is just like what we saw. So this is really doing something very similar to just doing a partial function in Python. To get image files, we just call get_files, passing in image_extensions, which is everything in MIME types that starts with image, ok, so then we can test that one, so image_getter is the same as a file_getter, but we get image_files, test that one, and so there you go.
So there's the whole of the functionality that currently exists for getting items, and I can imagine we'll add more of those over time, but that's a good start. So the second thing we need is functions for creating splits, and these are just things that return two lists, the list of stuff in the training set and the list of stuff in the validation set.
So for example a random splitter is something which returns a function, optionally you can set the seed, and it's just going to randomly permute all of your indexes, and then cut it at wherever you asked for, and then return those two halves. So there you can see, and so some simple tests of that, grandparent_splitter is something which looks at the parent of the parent, so like an MNIST or an ImageNet, that would be where the path would be valid or train, so that's that.
And so that all works the way you expect. So as you can see, these functions are super tiny, and so generally if you want to know more detail about how something works, and we should add more documentation obviously to some of this stuff as well, it's still early days, feel free to send in PRs with Docs if you're interested.
So good question from Kevin about what if you wanted to get audio files for instance, I think you know I would probably put that in an audio module, yeah I don't feel super strongly about it though, it would probably make more sense to get image files actually to be in vision.core now I think about it, but yeah, probably better to have everything for an application in an application module.
Okay so labeling is the thing which will for example take a path and pull the label out of it, so parent_label for instance will just label it with the name of the parent. So there's nothing to customize in this case, so we don't need a capital letter thing that returns a function, we can just call it directly, whereas regex_labeler, we actually need to pass in a pattern for what regex to label with, so that's why it's a capital thing which returns a function, so here's what regex_labeler looks like.
So remember if you want to really understand how these things work, if any of them are confusing, open up the notebook and just like we do in the fast.ai lessons, experiment, try some other tests, add some cells to the docs and try things out, so like oh what's in items, and there they all are, and it's like oh so what if we f item0, lots of experimenting, lots of debugging, all that kind of stuff.
Alright so there's the three basic steps, get_split_label, they're all very easy functions. So categorize is the thing that we have already used in 08, so to remind you, and so we're going to create something called category.create which is simply categorize, so when you see category.create, that's actually creating a categorize object, so for instance if we create a transform data set which goes cat_dog_cat, there's little items in it, and the transforms is this categorize, and then here we can test its behavior, so the vocabulary from those items should be cat_dog, for instance, the transformed version of cat should be 0, the decoded version of 1 should be dog, and so on.
So everyone's question is should there be a hash_test, nope, we don't need hash_test, as you can see, they just appear directly, so we don't need to add anything to say this is a test, we just include tests. If a test doesn't pass, let's make one that doesn't pass, dog_dog, then you get an error.
And as we mentioned last time, in fastai_dev, in the readme, here's the line that will run the notebooks in parallel, and if any of them fail, in fact I just ran it before and one of them failed, so I can show you, here we are, if one of them fails it looks like this, exception in blah blah blah dot ipymb, and then it'll show you the stack trace, and then it'll show you the error.
So that's how tests work, tests are just regular cells which happen to have something which has an assertion in basically, that's all test_ec is, we'll get to the 00_test notebook eventually. And so how do we get coverage tests? No idea, it's not something I've thought about, that would be an interesting question to look at.
It's not something I've cared about so much though I must say, because the tests always sit right next to the thing that they're testing, so it's really hard to have functionality that's not tested, it tends to be pretty obvious because you're kind of staring at it on the same screen.
So a categorize is a transform, so therefore it has an encodes and a decodes. So when you create it, so let's just call it categorize, it's just a normal Python object here, so it's done to init, it works in the usual way, so you can actually create it with a predefined vocab if you like, and if so it'll assign it.
If not, then it's going to use this special setup method. When does setup get called? Well you can see here when we create a `tifmds`, we're saying this is the list of items that we want to use with these transforms. So `tifmds` is going to, let's see, I'll just show you this, actually it's going to create a number of `tifmd_lists`, so we want to look at `tifmd_list`, and so here you can see `tifmd_list` in init will call `self.setup`, and `self.setup` will set up your transforms, and so that's the thing which is going to call `setup`, which in this case will set your vocab to a `category_map`, we'll look at it in a moment, that's just a method of vocab of categories, and it will use, this is a nice little idiom, it will use `dsource.train` if `dsource` has a `train` attribute, if it doesn't it'll just use `dsource`, it'll use your training set if there's a training set to find, otherwise it'll just use the whole data source.
So that's a super important idea, this setup thing, we'll see more details of that when we look at the code of the pipeline and `tifm_ds` and `tifm_list`. You'll see that `dcodes` is saying that I want to return something of type `category`, and that has a `category.create`, and a `category` is pretty tiny, it's inheriting from `show_title`, which simply has a `show` method, as you would expect.
And `show_title` is going to show passing in the keyword arguments that are in `self._show_args`, so in this case it's going to label it with the `category`. So the only other piece here is the `category_map`, and the `category_map` is just simply something which will grab all of the unique values in your column, optionally sort them.
And then we'll also create the `object_to_int`, which is simply the opposite direction. So `l` has a `val_to_index`, which is a reverse map. OK, so that's `category`. So Hector's question about the videos reminds me to talk about the forum, which is, thanks to people who contributed notes and other things, I was trying to think about how to structure this.
What we might do is let's create a `fastai v2_code_walkthrough_2`, use this for `walkthrough_2_notes_questions_and_expressions_object_to_int`. So, let's make that into a wiki. And so now that would be a good place to put notes, and so there's a good set of notes already for number one, thanks to Elena Onigpost. They're not quite complete yet, so either Elena or somebody else can hopefully finish off the last bit.
Oh, it looks like maybe they are complete now. Ah, there you go, she's done some more than since I last looked. Very nice. OK, so it is finished, beautiful. So it's a bit tricky in the forums if multiple people edit the same wiki post at the same time, you'll get conflicts.
So one thing you could do is you could add notes by replying to this, and then I can copy and paste them into the wiki, might be one way to avoid conflicts. Also if you look at the Fast.ai version 2.0 transforms_pipeline_data_blocks, Ian Vijay was kind enough to start adding some notes, so I've tried to try to give that some structure.
So you can basically create something where you've got second level headings for modules, third level headings for classes and functions, and then what I did for these was if you click on this random splitter instance, it will actually take you to the line of code in GitHub. To do that you can just click on the line of code, like so, and then click on the three dots and say "copy permalink" and it will actually create a link to that exact line of code, which is pretty cool.
And so that was for random splitter, so we can then go down here and say "bump" like so, and so that's a permalink to that line of code. So that's that, and then in the daily code walkthroughs thread, as I'm sure you've noticed, I'm going to start putting the video and the notes link just in the list at the top here.
How many walkthroughs are planned, as many as we need. What is desource, that's just a data source, it could be a data source object, but really it's anything which can be treated as a list, or anything which works with any transform you're using, it doesn't even have to be necessarily treated as a list.
Merge conflicts, yeah, as Molly said, once you've run run_after_git_clone, that'll get rid of a lot of the conflicts because a lot of the metadata is removed and stuff like that. Other than that, we just try to push regularly, if we're going to be working on a notebook for a while that we think somebody else might be working on, we'll let them know.
Yeah, nowadays we don't have too many conflict problems anymore. And the girl asked, "How did I start using PyTorch?" I started using it kind of when it was first released, so yeah, I guess I just read the docs and tutorials. I think nowadays just using the fast.ai lessons is probably the easiest way to get started.
The further you get into them the more you'll learn about PyTorch. That would be a good thing to ask other people on the forums too, because there are a lot of other people that have started using PyTorch more recently than me, who might be better placed to answer that question.
So as well as the category, we also have multi-category. The multi-category is something like we have in Planet. Remember in Planet, each image can have multiple things, like cloudy and primary and road. So here's an example of items for a multi-category dependent variable. You can see each one now is a list.
So item number one is labeled with b and c, item number two is labeled with a, item number three is labeled with a and c. So the vocab that we get from that should be a, b, c. And categorizing a, c should give us 0, 2. So that's what multi-categorize does, and as you can see it looks super similar to what we had before, except encodes has to do it for everything in the list, and decodes has to do it for everything in the list as well.
And so multi-category show is a little bit different, because we've now got multiple things to show, so we have to use the string join in Python. And so one of the handy test functions that we'll learn more about later is test_stdout, because the show functions actually print things, and so how do you test whether something is printed correctly?
Well this will actually test whether this function prints out this thing or not, so that's a useful little thing to know about. So normally you need to one-hot encode multi-category stuff, so we've got a one-hot encoding here, which works the same way that you've seen in PyTorch version 1 in the lessons.
And so here's a transform for that, where the encodes is simply going to call one-hot, as you see. And to decode, it does one-hot decode. I think these return types are unnecessary, yes, looks like they are, let's see if this still works when I remove them, yep, looks like it does.
Okay, now the way we've done types and dispatching and stuff has changed a little bit over time, so some of our code still has stuff that's more complex than necessary, I will try to remove it as I see it. If you're ever not sure why a type annotation exists, feel free to ask, the answer might be that it's not needed.
So here's a good little test then, a little mini-integration test of taking a bunch of items and passing it through a pipeline that contains multi-categorize and one-hot encode. And so that should, so TDS1, that would be A, should be 1 0 0, and then decode of 0 1 1 should be B C, and test it out.
Okay, so that is that. So we can put all this together to do mnist by calling getImageFiles, splitter, and so notice these aren't being exported because this is DataCore, so we haven't created any of the Vision application yet, so we don't want to export anything that uses Pillow, but you can certainly include it in the tests, right?
So for the tests we can bring these basic functions in, something that can open an image, something that can convert an image into a tensor, so here's our two transform pipelines that will look pretty similar to what we did in 0.8, and so here's our tifmds that takes our training set and our transforms, and so then we can grab one item of it, we can decode it, and showAt will take our tifmds and show the thing at this point, and you can optionally pass in some parameters that will be passed along to matplotlib, and these kinds of things we also check that there are some tests, that the title looks right, and that the figure is actually created.
So that's like a good little, you know, this entire thing is pretty self-standing, so this is pretty self-standing, so it's kind of a good place to get going. So Miguel says, "Completed the first AI, but you need to learn more PyTorch." That would be a good thing to ask on the forums, I think.
I mean, if you're doing all the assignments, then by the end of 14 lessons, I would have thought you'd have to be pretty damn good at PyTorch, because you do have to do a lot of practice, but yeah, I guess other people might be able to have their own ideas about that.
So Vishnu said, "I made a mistake about what imageToTensor is doing," that's true, it's actually creating an array, so I'm glad you asked that question, because this is going to be turned - okay, so this is actually a great question. The return type of here is tensorImage, and tensorImage is one of these nifty little things we've added, which is something which - this is taking a long time - looks like our server's going slowly - which, as you can see, is simply calling just pass, so it's just something which we use to mark the type so that we can create transforms that are restricted to that type.
But it's basically just a tensor, it's a subclass of tensor, in fact. But you'll notice this is actually not a transform, it's just a function, but the cool thing is that any time that you create something that's going to be turned into a pipeline, any functions in there that aren't transforms will be turned into transforms.
So you can actually just go transform imageToTensor, and that creates a transform object that will run that function, so that's a handy little trick, and we'll learn more about it when we get to the transform thing. So because this gets turned into a transform, that means that this will automatically take our NumPy array and will cast it to a tensor, and it'll also make sure that it only gets called on images.
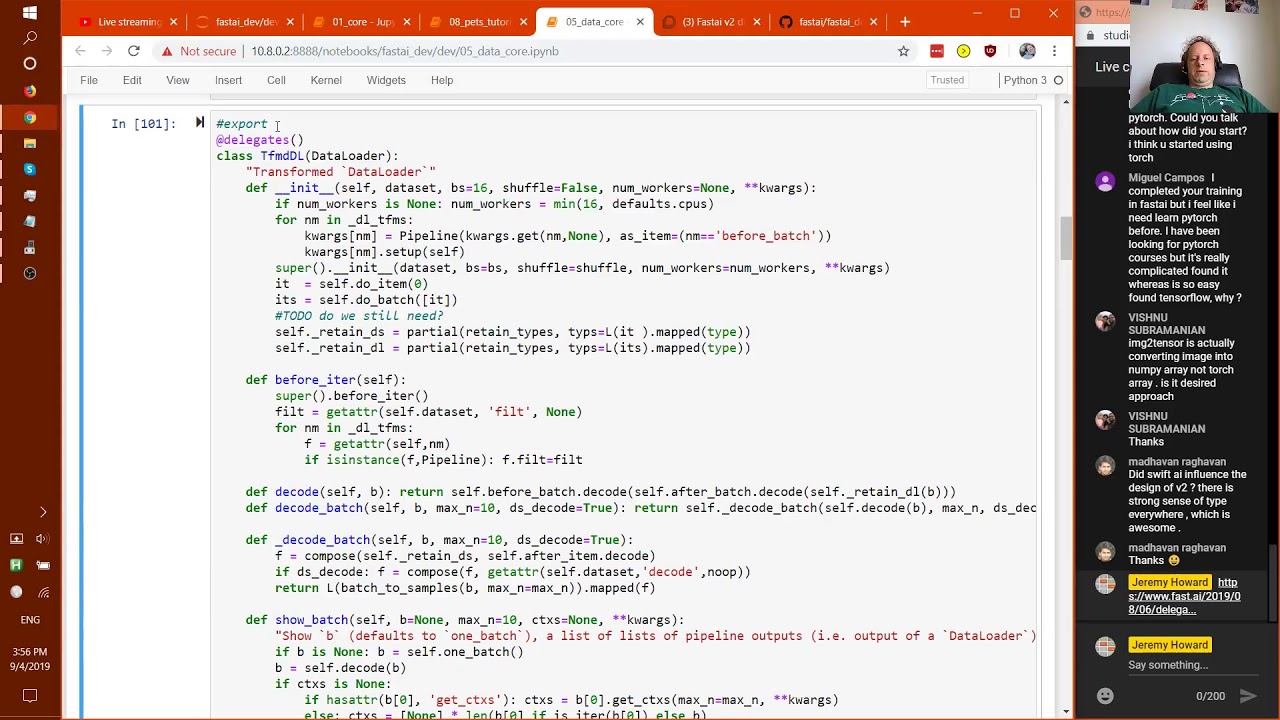
Okay, so last thing for today, tifmdl. So tifmdl is something that inherits from Dataloader, but actually this is not a PyTorch Dataloader, this is a fastai data.load.dataloader. So we've actually created our own Dataloader to add a lot of handy extra stuff to PyTorch's Dataloader, and one of the nice things we've made it is much more inheritable, so we've inherited from that Dataloader, and what tifmdl does is it turns the Dataloader into something which understands transforms, as the name suggests.
To fully understand this, we'll need to look at the code for Dataloader, which we can do next time, but there's a few interesting things to show. Let's have a look at it in use first of all. So here's a bunch of familiar looking transforms, so here's a tifmds, which takes our items, which is the MNIST paths, and transforms them, so it's going to create a pillow image and labeled categories, and then tifmdl is going to take that dataset and convert the images to tensors in the Dataloader.
So let's try that, and so we can now see there's a batch, and so this is a batch size of 4, so we've got 4 labels and 4 images, but one of the really interesting lines of code here is the test at the bottom, it's testing that the decoded version of the batch, when we map the function type over it, is that it's going to be tensor image comma category.
So why is that interesting? Well that's interesting because what this is showing is that fastai knows how to take a tensor that comes out of a Dataloader, which doesn't generally have types, and will put the correct types back onto it, and so this is super handy for inference, because what it means is that in production, your predictions and stuff are going to have proper types, so you can actually call normal methods and transforms and stuff on them, so it's super handy for inference, and also for applying stuff to a test set, things like that.
So this is actually an interesting line of code, so let's look at it. So we're going to start with tdl.decode_batch_b. So remember b was our batch, it's going to contain four MNIST images and four labels, so the decoded version of that is nearly the same thing, but now we've got, rather than two things, we've got four things, because they're four pairs of image and label, and now you'll see the label's a string, image and label.
So that's what decode_batch is going to do, is it's going to turn it into a form that's much more ready for showing, and so I think we should be able to go show_titled_image, and then we could say "show us the zeroth one of those," yep, there it is, OK?
And so then, what I wanted to do was I basically, that contains two things, if I just grab the first image, it contains the image and the category, and what I really wanted to do was to say like x,y equals that, and then print out type x,type y, which is a little bit awkward, so what we can do instead is we can wrap this in an L, and then just call mapped, and that will map a function over it, and the function I want to map over it is type, and that gives me exactly the same thing.
So that's what that does. Madovan asks, "Did Swift AI influence the design of V2?" Yeah, a bit, I've been using static languages a lot longer than dynamic languages, honestly, so I don't think the type stuff is particularly from that. In fact, we're using types in a very, very different way to Swift.
Swift is statically typed, so you can't quite do the same kinds of things with types. This is kind of like a, to me, really interesting use of dynamic types. And so like a, I think part of it comes out of saying like, OK, Python has a lot of issues with performance because it's a dynamically typed language, but we may as well at least take advantage of the dynamic typing of the language.
So we're kind of trying to take more advantage of Python's foundations, it's kind of part of what's going on. But yeah, I think doing the stuff with Swift certainly had some influence, and certainly talking to Chris Latner had some influence, specifically. So a "transformDataLoader" has a ".oneBatch" method, which actually you'll see isn't here, and that's because it's in DataLoader, but we can look at "termDl.oneBatch", and as you can see, it'll give us the definition even though it's actually in a superclass.
And as you can see, it's just going next, which we do all the time, so we thought we may as well put it into a method. It's really something you just use for interactive usage and tests. So let's look at "termDl" some more. Here's a transform with encodes and decodes, and so specifically encodes is -x, decodes is -x, so that makes sense, it's a reversible negative transform.
And these are both things that can be applied to a whole batch at a time, because the negative operator in Python doesn't care what rank something is. So we can put that in the after batch, and so if we had cruder as well, then this would actually run on the GPU.
And these things also all work with more than one worker, so there's no need to do next in a tdl, we can just do tdl.one_batch. And in this case, it's actually making sure that, so if we look at train_ds, that's got an image and a label, and the type of train_ds image is a tensor image, and so one of the interesting things here is we're checking that the type after going through the transform is still a tensor image.
Now that's actually not particularly easy to do, because look at this. What if we say t equals that, and then we'll go t2 equals negative t, so type of t is tensor image, but type of t2, oh sorry, let's actually just do it a different way, torch.neg(t) is tensor.
You've got to be a bit careful, and so actually this would be a better test if we used torch.neg(x). It still passes, even though it looks like it shouldn't pass, and the reason for that is that all of the transformation pipelines, tf.nds, tf.ndl, stuff like that, all check after it goes through encodes or decodes that the type doesn't change, and if it does change, then it will convert the type back to what it used to be, but it only does that in a specific situation, which is this one, where you end up with a superclass, torch.tensor, of the input, whereas the input was a subclass of that, so tensor image is a subclass of tensor.
This is something that happens all the time with like pillow subclasses and tensor subclasses, that very often the operations will forget what subclass it was, so you don't have to do anything, it will automatically put back the correct subclass for you. It's possible to opt out of that behavior by just putting return type of none, and that tells the transform system not to do that for you.
As you can see, it now doesn't pass, so that's how you can opt out of it. I don't think I've ever needed it yet though, so far it always has made sense in everything I've done that you always want to keep the subclass type information, so that all happens automatically.
Okay, so why is this here? I don't think this is meant to be here, I think it's in the wrong spot. Let's double check, I think we've got this over here already. I think O1 core is getting too big, we might have to split it up. Oh, that does look different, that's interesting.
Here's another example, we've created a class called capital I int, so the normal int in Python is small i int, capital I int is a subclass of that, but it's also a subclass of show_title, so it's a type of int that has a show method, basically. So we generally, if you want to be able to show an int, then you just put returns a capital I int.
And so here, let's see, are we doing a different deal, yeah, so here we're just basically checking that this type annotation works, and we'll learn more about those type annotations once we look at the transforms notebook, but as you can see, all the types are following through correctly. Okay, so some of these other things I want to come back to later, specifically how filters work, so let's have a bit more of a look at dataloader.
So I'm just going to show you a couple of pieces of tifmdl, and then we'll go back to dataloader, and then we'll come back to tifmdl. One thing that's interesting here is that there is a thing called delegates on the top here, a decorator, which we have, composition, there we go, I have described in more detail in this article, okay, but I'll give you a quick summary of what's going on, have a look here.
Basically, tifmdl is a subclass of dataloader, so when we call thunder_init, we basically want to pass along any keyword arguments that you gave us. The problem is that normally when you put quags like this, there are a couple of issues. The first issue is that if we want to use things like shift-tab, and we go to tifmdl, and then we say shift-tab, rather than seeing the actual list of things that we can pass in, we would see quags, which is super annoying, but check this out.
That's not what happens here. We see the actual arguments. How does that happen? And it's not just we see them, but we also have all the normal tab completion for them as well, even though those are actually coming from dataloader. The reason that's working is because of this delegates decorator, and what the delegates decorator does is it will replace the signature of a class init or function, depending on what you put it on, and if you put it on a class, by default it will remove the quags from the signature and replace them with the arguments of the parent class, and so that's why this works so nicely.
So we use this kind of stuff quite a lot. So you'll quite often see quags used in Fast.ai version 2, but you should find in every case that we've used them, you'll always get proper shift-tab and completion support, and so if you ever find that's not true, then feel free to let us know, because that would be considered a bug, generally speaking.
So this really does behave like a dataloader, but it's a dataloader which has a few extra things, perhaps most interestingly is it has show_batch. So show_batch is the thing that we saw over here. We saw it for segmentation, show_batch, and we saw it for pets, show_batch. So the idea is that you can take a tfmdl and call show_batch, and it will know how to display whatever's there, and it even knows how to combine the information from multiple data types, in this case a mask and an image, in this case an image and a category.
You can pass in a batch to show, if you don't it will default to one batch as it says, as you can see here, and so what it will do is it will first of all decode that batch, and specifically decode means decode using, decode the after_batch transform, and decode the before_batch transform, so that's all the stuff that happens after it's collated.
We then have these things called contexts, and contexts is like, it's either the plots, like in this grid of plots, each one of these will be a different ctx, a different context, for things that display a data frame, each column I think it is, or maybe it's a row, is a different context, so here if you don't tell it what context to use, it will actually ask the type, the object in the batch to provide it for us, we'll learn more about that later, and it will then attempt to decode the batch using the after_item decode, and it will then attempt to call .show, which we will see .show in more detail later.
You'll see that we're often using things like compose, so hopefully you've seen that from previous fast.ai, but basically compose is going to call this function, and then this function. This is a really useful idiom, if your dataset has a decode method, then this will get self.dataset.decode, if it doesn't, it will get no_op, so it does nothing, that's a nice, easy way to do that.
So yeah, that's probably enough for now, that's 90 minutes, oh, the other thing you'll see is we kind of generally have documentation and examples for the kind of high-level how the class works first, and then underneath it you'll have a subsection called methods, where we go through each method and show you how to use each method separately, and again there's lots of room to add more pros and examples to a lot of these, but every one of them has at least one example, so you can see how each thing works independently.
Okay, so next time we will at least make sure we go through and finish off the CUDA, byte to float transform, normalization, and databunch, and I'm not quite sure where we'll go from there, but we will figure it out. Okay, thanks everybody for joining in, and thanks also for those of you who have been so helpful in adding some documentation and notes and stuff on the forums, that is super cool.
See you next time! you