AngularJS end-to-end web app tutorial Part IV
Chapters
0:01:48 Heroku
3:55 Create a Git Repository
5:24 Initial Commit
7:55 Add the Sql Server Add-On
8:13 Install Add-Ons
8:57 Attach It to Github
9:2 Configure Github
10:28 Differences between My Development Setup and My Production Setup
11:46 Connection String
13:10 Push to Github
13:25 Commit to Github
Transcript
So so far we have a web application up and running on our own machine which is able to create, edit, delete, list, search, sort, and paginate to do so. So that's the basic basic structure of all kinds of programs that you might write, or at least subsets of it.
So for example anything that has like a login system you probably have some way to create, search, edit, delete, etc. of users. So often an actual application will consist of kind of multiple entities like that which you have this basic functionality around. So we're trying to make it reasonably fast and easy and reusable to create that kind of functionality.
Big problem is no one else can use this fantastic application because it's currently sitting only on my laptop. So we need to deploy it. Another issue is that if I go and screw something up in the future I have no way to like go back to an earlier version of the working version of my application.
So I really want to put it in some kind of version control system and that would also be useful when other people come along and offer to volunteer to make my wonderful application even better. And we have multiple people working on another good reason to have it in a version control system.
So it actually turns out that the easiest way to deploy stuff onto all kinds of systems is to go through a version control system anyway. So what we're going to do today is we're going to deploy this onto something called App Harbor, which is specifically a hosting service for .NET applications.
I will point you over to Heroku as well. Heroku is something for deploying various other types of applications including Ruby and Python. And I particularly have this page open in Flask and Postgres on Heroku because I think this is the closest to what we're doing. It's like a pretty fast, lightweight, easy to use web application framework for Python called Flask and a pretty nice database called Postgres.
And there's a nice web page here that I'll link to from my blog which somebody else has written which describes how to do similar things to what we're doing today with .NET App Harbor using Flask and Heroku. So anyway, today we're going to do our .NET/Angular application plus App Harbor.
So you'll see it's surprisingly easy actually to get this from my laptop and up onto the web where everybody can use it. And the reason this is really useful to me is that you can quickly prototype stuff, check it up on the web, get your friends or colleagues to use it like as an internal tool or whatever, get lots of feedback.
So you can really get lots of iterations based on real feedback as you develop your application. So the first thing we have to do is get our code into a version control repository. Of course all the cool kids use GitHub, so that's what we're going to do. So we have our folder here, Angular Tutorial, which is the Visual Studio project.
GitHub, for those who haven't used it, has a really nice little Windows application which of course you can use the console. But I've actually been finding the Windows application a bit more productive in some ways than the console recently, so that's my current tool of choice. And that's unusual for me because for the last 15 years I've always used console-based version control clients.
This is the first time I've really liked a GUI. So I've got to create a Git repository on my laptop, so that basically means that my laptop is going to keep track of every time I change a file, so that I can go back to previous versions if something goes wrong or see exactly how things have changed or so forth.
This is actually really really really useful for data scientists, like for example if you're entering a Kaggle competition, it's super cool every time you like submit a solution you can basically commit your Git code at that point, give it a little message saying this corresponds to a particular submission, and then later if you try to remember why it was that that earlier one is better than this later one you can go back and see exactly how the code's changed.
So there's lots of good reasons to stick stuff into Git. And this is how easy it is. Grab the folder, drag it to where it says drag, and drop it, and give it a name. I'm going to push it to GitHub, and create. And that's it. So that's exactly how easy it is to create a Git repository nowadays.
So that was pretty cool, wasn't it? So let's have a look at our Git repository. So the first time we look at our Git repository, obviously there's a fair bit of stuff in it showing new, and that's because absolutely everything in here is new. So let's commit our basic initial commit.
So let's just call it InitialCommit. So when we commit, that means that we're taking the stuff that's on our computer and basically saving a particular version of it. So I'll click Commit. So this isn't actually sending it to the server at this point, it's just saving a version of it basically locally so that we can go back to it later.
In order to actually send it to the server, we'll have to click the Publish button. There we go. So we now have an initial commit, and you can see we can go back and undo this commit or whatever, or else we can actually send it off to the server.
So I'm going to send it off to the server, which means publishing it. Since I'm using the default GitHub configuration, it's public, so it's important to realize that unless you pay them to have a private repository, clicking this is actually going to make your code available to everybody. So now that that's finished publishing, you can see here it says that it's in sync.
So we can actually go over to GitHub now and have a look at github.com and we can see here's all our files. So the next thing we're going to do is, let's just follow through the little blog post here. So we've created a GitHub project, we've committed our code.
So now we're going to create an application on App Harbor. So literally, here's App Harbor. Once you've signed up, it's just as simple as typing the name of your application. So what should we call this? Angular tutorial. There we go. And you can say where you want it based, so that'll give you lower latency depending on where you are.
Create new. So here is the page for App Harbor for setting everything up. And all we have to do is connect our App Harbor application with GitHub. And that way it's actually going to go to GitHub and pull in my code and compile it and run it for me.
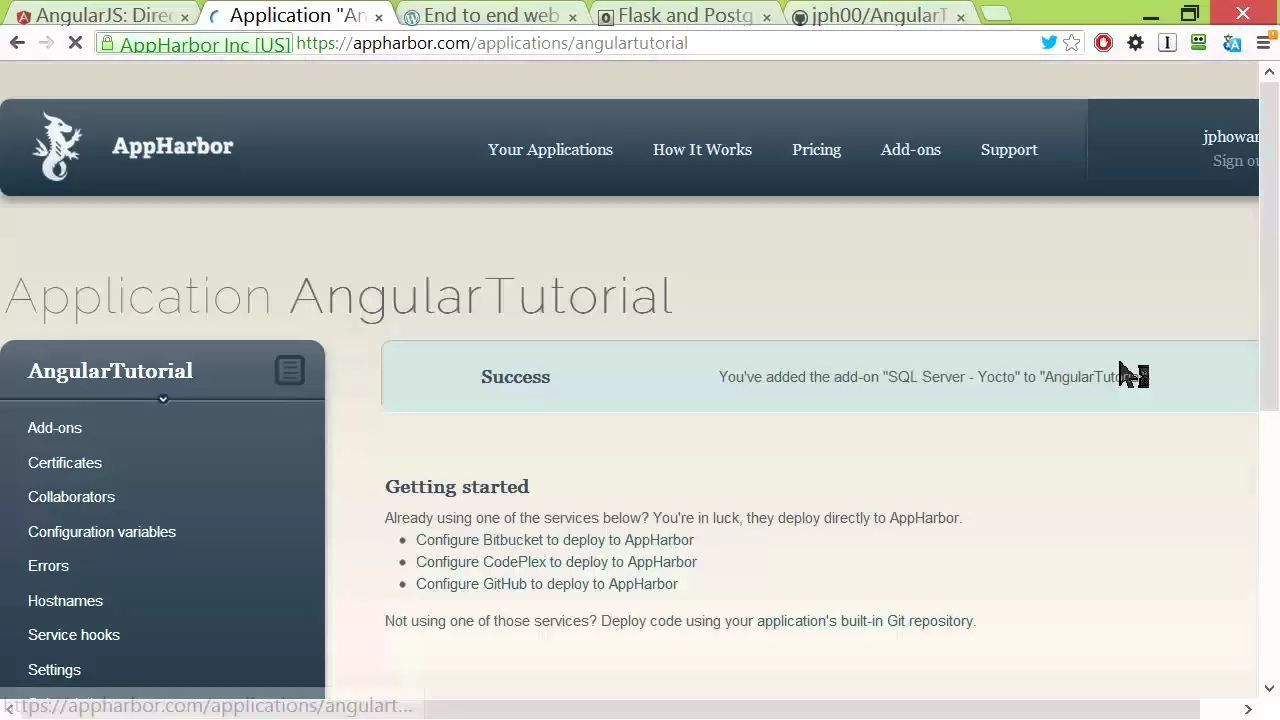
So to do that, we click Configure GitHub on our main App Harbor project page. But before we do that, we should add the SQL Server add-on. So there's lots of databases and other services you can add to App Harbor. Most of them have like a free version, which is a little bit, a paid version that's a bit more.
Heroku works much the same way. So to do that, we will go Install Add-ons from the add-on catalog. We will go to, you can see there's lots of them here. We're going to go down to SQL Server. And it shows you here what different versions you can get, how much they cost.
It's actually not bad for 10GB of database, which is quite a bit. It's $10 a month, so you can run a decent system for not much money. I'll just get the free 120MB, which actually for like a prototype is going to be enough to manage user data and other config data for a reasonable number of users.
So I've now added the SQL Server to that application. So now I'm ready to attach it to GitHub. So here we are, configure GitHub. So what is the repository? So you can see here it's listed all of my GitHub repositories. So I'm going to grab Angular Tutorial, and I'm going to add that as my App Harbor application.
So you can see that it's got a link to my GitHub. It's gone away, it's found all of my repositories. I choose the one I want, and it's going to now download everything from that GitHub over here. So while that's happening, let's go to the next step. So currently, our database is set up to use like a local database that's on my particular laptop.
But we now have a database provided by App Harbor for us that we want to use, but we only want to use it when we're in App Harbor, not when we're running locally. This is quite cool, like Visual Studio has like a built-in way to do this, basically to say I've got different configurations depending on whether I'm in development or in production.
In particular, in the configuration file, which is web.config, there's one file called web.config.release, one file called web.config.debug. That's in those files, you can basically say what are the differences between my development setup and my production setup. This is a super neat approach, and you can in fact add additional configurations, so you can add a staging configuration as well.
So that way you can kind of stick something up on a beta server or something like that. The actual way it works is kind of slightly obscure if you're not familiar with it, which is it uses a particular kind of XML transform format, which is why I've actually just got the particular code that you need ready to copy and paste.
So I've just copied it, I'm going to go back to Visual Studio, and I will go to web.release.config. So there's a default version here which just tells you how it works, and I will just paste in this version. So a couple of things you need to change, the first is you need to put the correct name of your database context, so in my case I can actually go to the context class and see what appears here.
That's actually the name of my database context, so I'm going to paste that in there, and then the second thing is I need my connection string for App Harbor, and App Harbor will tell you that if you ask it nicely. You can just go across to, I think it's in configuration variables, here we go, here is my SQL Server connection string, so I can just click this button to copy it, go back here, and paste it.
That is not what I meant to copy. Let's assume that if I scroll a little bit to the right, there's another button which I might use, there we go, instead, and now everybody on the internet knows the secret password to my free 20 megabyte SQL Server, fill it up with BAM.
So I've saved that, so at this point I've now got a configuration of this such that when I upload it to App Harbor, App Harbor knows that they are considered production, so they know that when they compile this, they compile it in release mode, which means any transformations in my web.release.config get run automatically, and that's all that's required.
So we now have to push this, of course, to GitHub, from where, this is quite cool, what actually happens is when you push to GitHub, because if we configured it to be connected to App Harbor, it basically tells App Harbor that something has been pushed to it, and then App Harbor goes and grabs that automatically and rebuilds it, so that's how easy it is to deploy something new, is literally you just commit to GitHub.
So, let's do that. So, I just clicked uncommitted changes in GitHub, and it shows me that I've got some changes in web.release.config here, and if I fold that up, you can see that's the only file there. So I give this a commit message, web.release.config DB Transform. So, just remember that when we commit this, it just saves kind of a snapshot locally, I actually have to click sync to actually make that get sent across to GitHub.
So now if we have a look in GitHub, we can see there's been a change just now, we can see exactly what changes have been made, we can see what was added and released, that added and removed rather, which files are changed, so forth. Feel free to come and leave comments on my exceptionally interesting commit if you want to.
So let's go back and have a look at App Harbor. So you can see on App Harbor now, it's noticed that something got committed to GitHub, and therefore it's now working on deploying this change. So, as you can see this particular status here is queued, which means behind the scenes it's compiling this, if there's any tests in it, it'll run the tests I believe, it'll do the release transformations, and behind the scenes it will go away and make sure that as it switches over to the new version there won't be down time for you.
And this is not particularly different to other systems like AWS or Azure or whatever, what's different is just the process of setting it up for deployment and having it connected to GitHub and stuff is pretty nifty. And even the fact that you can add services like SQL Server and so forth, it gets to the point here where it successfully built it and at this point I can click this deploy button, and that's going to actually make my exciting thing ready up on the internet.
So you can see now its status is active. And if there's any problems you can actually see exactly what all the messages are, here's all the steps that it was doing, it was running tests, which I don't actually have unfortunately, so you can see exactly what happened there. So if I go to host names, I can find out the host name of the application that's created for me, and in general it's pretty easy to guess it'll be the name that you gave it with apphb.com.
So if I click on it, we should be able to see my application running. Oh, we need index.html. So we should make some changes in the future so that the default route rather than going to this default web API pages goes to our impressive application but for now we can type in index.html manually.
So right now this is not showing any to-dos, and that's because our seed hasn't been run. And now of course our seed is only really for testing purposes so maybe that's actually exactly what we want. But in general, your seed will be something which doesn't just seed it with test data, but seeds it with the specific data that you need for your application to work.
So maybe there's some particular set of products, a products table, or some particular settings that you want set up and so forth. So actually in real life you do want your seed to run, and also you need to make sure that your migrations, which is like the changes to the SQL that get automatically created as you change your models, also get run.
So in fact, to have that work we do need to do one more thing, and this is specific to C# type applications. There's a similar thing in Ruby on Rails as well with their migration setup. So how you do it is a bit different in each case. But the general idea is that we need to make sure that when the thing is deployed, that that seed and migration stuff actually gets run.
So that was a thing that in the package console, remember it was called update-database, like we type update-database each time we wanted to make sure the seed method was run, and that the database migrations had all been run. We can effectively do the same thing every time that this app is actually run by overriding this onModel creating method and putting this code into it.
So, let's just again copy and paste the code, and we'll go into our context. And this is where we can paste in that code using the appropriate context name. So basically all this says is that every time you are running this application you should first of all migrate the database to the latest version.
So that's good that we saw what happens when we forget to do that, because in the future if you changed your database and then suddenly thought, "Oh wait, my application is broken because the database didn't change on the far end. How do I call update-database?" This is how you do it.
So of course all we do now is we commit it, update-database automatically. We can then sync that. That sends it off to the server. App Harbor will then automatically get told by GitHub once that commits complete. That will then rebuild the application. We can then deploy it, and as soon as we go to it, it will then automatically run our seed method and any database migrations that are new since last time.
It's quite neat. It actually keeps kind of like a hash of this database, so it knows about exactly what database migrations it needs to run to get from where you were last time to where you are now, which I think is super neat. So if we go back to Angular, not Angular, if we go back to App Harbor, we can see how it's going.
And we can see this is currently processing. So while it's processing, our old version continues to run as before. So it doesn't like stop it or anything, so that's quite nice. So that commit from GitHub, and you can see even the commit message appears here in App Harbor, it has finished being compiled, tests run, etc.
And now we can deploy that. So at this time, this latest one is currently active. So since it can always go back to a previous version with GitHub, you can just click deploy, and deploy a previous one. The nice thing is that for every database migration, it has both up and down methods, which means that when you go back to an old deploy, it will actually unwind the database changes to make sure that the code at that point and the database at that point are automatically in sync.
Which I think is also pretty amazing. So let's go and see if we now actually have some data. So we'll hit F5. And we can see the data is now being populated. We can check that things work. So for example, edit, that's fine, cancel, search, reset. So this is quite nifty, right?
So this thing that we built quite quickly and had running on our laptop, we were able to get up and running literally on a public web server. It's going to scale and everything for me automatically if it gets super popular, which I'm sure it will. As I need more space and more processing power, I can just buy upgrades as a service.
I'm not sure if I would necessarily use this kind of service to run Kaggle or something, because at some point you want the ability to customize things, maybe a little bit more. But I think for kind of testing out things with customers or creating internal tools or creating little helpers or whatever, I would much rather than people create a little Python script or something and say, oh, you could use this by downloading it from GitHub and installing Python and installing these dependencies, then you could run it from the console, and blah blah blah.
It would be so much cooler if every time somebody had a little script like that they said, oh, I've made this available behind a web interface on Heroku, here it is, please feel free to start using it. That would be pretty ace, I think. Alright, so there we go, so that's our beautiful to-do list up and running on the internet.
It's taken us more than an hour to both teach and develop this, but I think it's fair to say that if you have the templates ready and you want to type and so forth, it will take an hour-ish, probably not the first time you do it, but maybe later.
I recognize that the last step of deploying it, there was some code a couple of times that we had to copy and paste, like that XML transform and the automatic database thing, which is not particularly attractive to look at, but literally that never changes. So you can just copy and paste it.
I'm sure at some point that stuff will end up behind bits of GUIs, or people will automate that even further, but I don't think it need to stop anybody from going through these depths, you just have to be able to copy and paste it from my blog, or stick it in a template on your computer or whatever, and then you're up and running.