AngularJS end-to-end web app tutorial Part I
Chapters
0:00:3 creating a web application
4:12 display the details of an existing one
15:41 run the server
27:11 create an index dot html
34:11 writing some code
38:29 add an input tags
49:19 use a filter in your html
Transcript
So today I'm going to be demonstrating creating a web application and it's a pretty standard kind of web application which we'd call a CRUD application. We can talk more about that in a moment but basically something that's capable of listing, displaying, changing, updating and deleting stuff. For some reason whenever people demonstrate creating CRUD applications it's always a to-do list so we are not going to be any different and we are going to create a to-do list.
But it's interesting to think about, for example, what if you're creating an email application. You're basically listing, displaying, creating, deleting emails, for example. So you know, CRUD applications are pretty widely applicable and the stuff that we'll be seeing today, you know, it's flexible enough I think you'd be able to use it quite widely.
I'm going to be showing a particular set of tools. So there's a back-end part and we'll talk about what that is in a moment with the stuff that runs on the server and that'll be written in C# and WebAPI with SQL Server and Entity Framework code first. That whole section is like, you can replace that with anything you like really, really easily and I'll be showing how to replace it with Python and SQLite today in fact because that bit's like very, very fast, very, very simple, doesn't do very, very much at all.
The interesting part is all at the front end, the stuff that runs in your browser and I'll be showing how to use a framework called AngularJS which is a framework that comes out of Google and it's quite mature because they've been using it at Google for quite a while.
It's a very sophisticated and very complete framework to make it really easy to write pretty powerful web applications. It's a bit of a learning curve and the documentation is very complete at the moment but it's not as friendly as it could be so hopefully this tutorial will fill in a gap around getting started with it.
I'll also show how to make it look like not totally awful by stealing styles from Bootstrap. I don't know if you guys have seen Bootstrap before but it's something that came out of a couple of guys at Twitter so basically make it really fast and easy to make your websites not look too sucky.
I'm not going to spend any time making it look any good but just slightly unsucky but the nice thing about Bootstrap is again it's very flexible and so it's very easy to make it look pretty good. You can even download themes and make it look as nice as you like and I'm actually going to make this end to end which means I'm actually going to get this website up and running on a public facing server that anybody can access because that's a piece that people often miss and I want to show you how easy even that is because it's no good if it's just running on your own laptop.
Just get straight into it unless anybody has any questions. We're going to start with the back end and let's first of all have a look at what it is that we're going to be building. Here is the finished product as you can see it is a to-do list and it basically can do a number of things so let's try and enumerate what those are.
In fact we might as well just type that. It's going to be able to list to-dos and then within that we want to be able to search through them, we want to be able to sort them, we want to be able to paginate them. In other words if there's lots and lots of them we don't want to just download the entire set at once but rather be able to download a page at a time.
Then we need to be able to edit a to-do that already exists or create a new one and also need to delete. If we change these words slightly to oh and also we want to be able to display the details of an existing one. So if we change these slightly to retrieve and change the order slightly so we're going to create retrieve and instead of edit we'll call that update.
You will now see we have CRUD so this is why this is called a CRUD application. The retrieve fit is both a single one and also a list of them. The way we're going to do this is let me draw this actually is we're going to have you've got like your browser over here and your browser only really knows how to run one kind of language which is JavaScript.
It knows how to display stuff that's written in HTML and it knows how to display it by running that through CSS styles. So we're going to use JavaScript to do all the heavy listing but we actually need, behind the scenes obviously these things are going to have to be stored somewhere, they're going to be stored in a database so that's going to store a whole bunch of to-dos.
And then something needs to be able to connect up the database to your browser, in other words make those database functions available to your browser and the way we do that is using something called REST. So REST is basically something that allows JavaScript to talk to our server through standard HTTP and in particular HTTP provides a number of different things, it provides something called GET.
This is the thing that normally your web browser uses to display web pages. It has something called POST which is the thing that your browser normally uses to like upload files or submit forms or stuff like that. It also has something called DELETE and it also has something called PUT.
Those last two generally your browser does not make available to you but they do exist behind the scenes and if you look they actually correspond quite nicely to the CRUD thing. So we've got a create which is actually POST, we've got a retrieve which is actually GET, we've got DELETE already and we've got an update which is actually PUT.
So all REST does is it basically provides something accessible from JavaScript that maps each of these HTTP verbs into each of the CRUD things to run against the database. So GET would for example get turned into a select statement using SQL, POST would get turned into an insert statement, DELETE would get turned into a delete statement and PUT would get turned into an update statement.
So the proportion of websites that do something that is not CRUD, well I guess you would say the majority of websites do things that are not CRUD because they often just display things. But in a sense the way they display them often behind the scenes is using CRUD. So take a blog, most of the time when you're looking at blog posts you're basically doing a retrieve of a list and behind the scenes of course somebody's got to be creating, deleting and updating those so I suppose a blog is a good example of CRUD.
An example of something that would not be a good example of CRUD would be something like an HTML5 game for example or people create things like colour pickers or stuff like that. So Kaggle.com certainly has plenty of CRUD types in it, you have to be able to create competitions, delete competitions, update competitions, list competitions, create competitions, do competition and so forth.
Yeah, a good proportion of the world's websites have multiple CRUD pieces going on in them. So for example in an email app you have CRUD for emails, for contacts, for folders and each of these things you need somewhere to create them, list them, delete them, change them. So because this is so common this is something that is really easy to do.
And so what we need to do is we basically, if you think about what's the minimum necessary that we could possibly have to tell a computer, we would at least have to tell a computer like what is my, we'll call it a CRUD object, what's the thing which I'm actually trying to create, delete and so forth and when I say what is it, what I really mean is what are its properties.
And that's I think really all we ought to have to tell the computer what are its properties, oh and I guess we have to call it like what is it called, in our case it will be called to do. So that's actually what we're going to start by doing and this is where we're going to do it on the server because this is kind of where the database is going to be built and where this API is going to have to be provided from.
So this is where I'm going to start with Visual Studio which is a really nice IDE for creating a variety of applications including applications of this kind, they call them web applications. So let's create one, we'll call it angular tutorial. And so we say here we want to create a web application using the latest version of the framework that Microsoft have which is called ASP.NET MVC and then it says alright what kind do you want and I want to use web API which basically means I'm creating this really minimum kind of interface for it, can't quite see the bottom of this so let's move this up.
Oh that's really annoying, let's try to double clicking that, there we go. So now that's creating the project, let's go and see what we do next. So here's, that's what we've done, we've selected the project, there's some, here we go, so are we ready yet, I'm still creating, this is my blog.
There's a, the API which it creates for you can use either JSON which is JavaScript object notation or XML which is perhaps more common in big culprits in a slightly older format. By default the API uses XML unless you specifically ask otherwise so there's actually just a couple of lines that I'm going to copy and paste to tell it to use JSON by default instead.
It's totally unnecessary but I just find it nice because it makes it easy to debug it by actually viewing the JSON so let's do that if it's finished. So I have to go into web API config, web API config and register so I'm just going to paste it there, so that's totally unimportant in that section but it's in our list so now we're ready to create this minimum amount of information that we should have to tell the server which is what is the object that we're trying to actually create and the way you do that pretty much regardless of what language you're doing is you create a class for it.
So generally speaking there will be something called models or something like that, whatever language you're using and then we can just create a new one by just creating a class. So we'll call ours todo so the first thing we have to do is tell it what is the name of the object so we've now called it, given it a name and the next thing we have to do is we have to tell it what are its properties so we're certainly going to need an ID, we're going to need the actual text of the todo so should we call that text maybe?
Would it be nice to have a due date? Question mark in C# means it's nullable, in other words you don't have to fill it out. What else did I have in my list, oh priority that's a good idea, so let's also add priority. Okay so at this point we have now told what I believe is everything that our computer should need to know in order to create our web API for us so at this point we're going to tell it to create a web API for us so in C# the way you do that is by creating something called a controller and we will call this todo controller and it is a API controller so in other words it's going to create one of those JSON APIs or REST APIs, it's going to create it for our todo class and we need to have it create all the database stuff for us so we'll ask it to do so, we'll click add, we'll wait for a few moments and while that's running, yeah so I will show you that once it's done.
It looks like it's finished, you can see it's created something called todo controller, you can see it's created also something called todo context which consists of like two lines of code and we're at a point now where I'm going to hit F5 to run this or you can go debug start debugging and that will build it and run the server and we should be now at a point where we have a working API.
Now it will even tell us where the API is and as you can see here it's got, it's going to be API slash todo so let's try going to API slash todo. You can think about what you expect this to return while we're waiting for it. The first time that you go to it, it kind of has to compile a few things in the background and so hopefully you guys had guessed that it was going to return an empty array in JSON and so that means it's returned square brackets.
So we now have a working API and Anthony to ask your question about what's happened behind the scenes, let's have a look in SQL Server. And you'll see that behind the scenes it has automatically created, this is one I did earlier, here's today's date, a database for us and within that database it has already automatically created a table for us.
Even the way it's todo is by adding an E and within that table we'll see that it has automatically created our columns for us once eventually that runs. So why JSON over XML? JSON is easier for a human to read, it's more compact, it's simpler to both create and understand.
The question would be why would you use XML over JSON really? Also JSON, it's very easy for computers to parse as well, so it tends to be very fast and everything supports it. Here's the columns that we've created and again automatically they've been typed and so forth, our date is nullable because we asked it to be, our priority is not and so forth.
So you can see everything automatically has happened behind the scenes to create our database, to create our web API and that is why I say don't worry too much about the backend, it's super easy. I'm now going to show you the Python version, I'm not actually going to type it in, I'm just going to simply show it to you.
In Python, I've used here something called Flask Restless, which is kind of like a web API equivalent for Python. You basically tell it what kind of database you want to use, in this case I've said use SQLite, you then create your class, you then create the fields in your class, I've actually got a few extra fields in here just for playing, and then you don't actually have to like right click something and say create framework, instead you simply say manager.create API, you tell it what class you want to create a JSON API for, you tell it what methods you want to support, you tell it by default how many results you want per page and you say app.run and that provides exactly, basically nearly exactly the same API as I just described.
So as you can see Python and C# really require you to type pretty much the exact same code. The big benefit to the C# version is that the code, it's created for me, I can go and edit to change later, or else the Flask Restless version, it's all pre-programmed in.
Although of course you can use Flask to create your own API endpoints, but really the main message is here, don't worry about the back end. Again even in the Python version db.create all, make sure that the database gets created, creates a table, creates a field, so on and so forth.
So that whole section is really easy. And the nice thing is like the debugging, you can always go back and actually type in your endpoints and actually watch them work, so in case something doesn't happen you can see why. Yeah you can post queries through the browser in a wide variety of ways.
In Windows there's something called Fiddler which makes it really easy to hand create your own HTTP requests basically of any kind. It's going to be easier to write our application if there's already some data in it. So generally speaking when you're doing an application like this you want to do something called seeding the database.
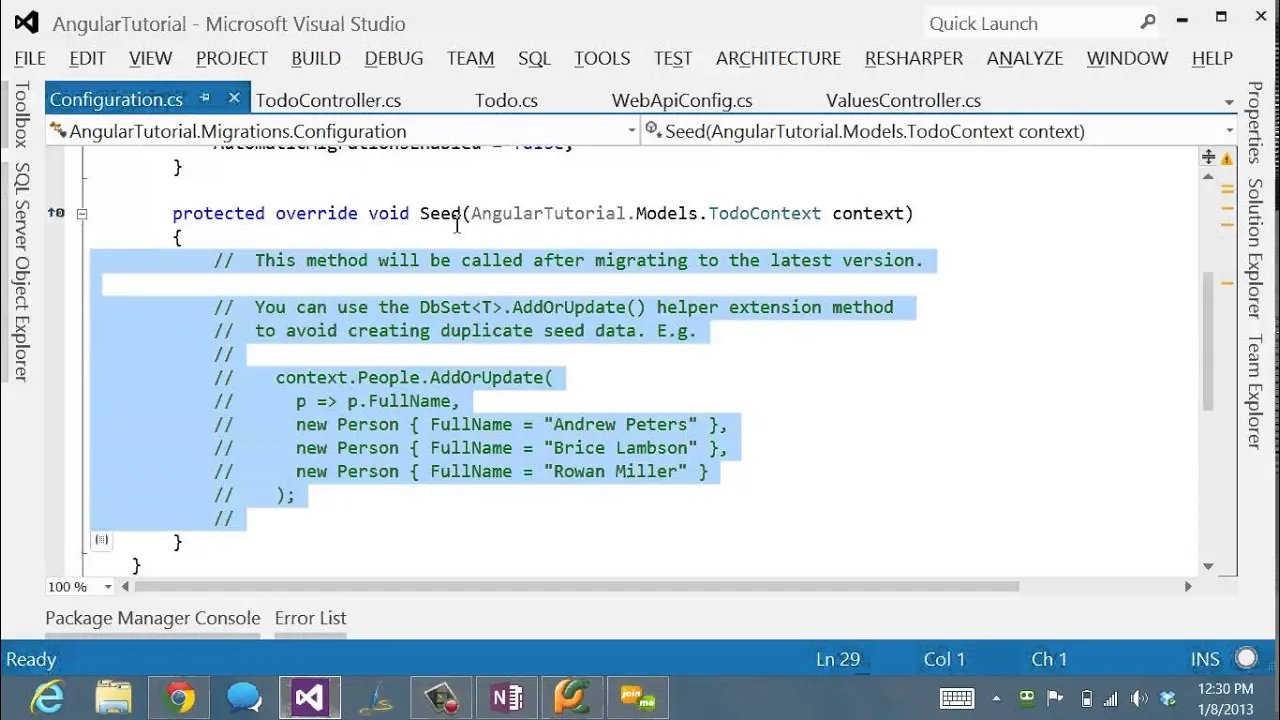
This is again something that's going to be specific on what back end you're using. In Visual Studio it's really nice and easy, there's basically a console that's available to you, a REPL that's available to you to let you do that. So you can basically go package manager console and there's a system called migrations which is a system that on the back end allows you to do things like database updates, seeding the database, so on and so forth.
So we run a command to turn it on. Turn the scenes to those who are interested, this is actually a PowerShell prompt that's actually sitting here inside Visual Studio with access to all these Visual Studio objects. So that's created this thing called the seed method which we can now use to fill it with data.
So I'm not going to manually type that in, let's just copy and paste it. So this particular version is just going to use a random number generator. Some of these are slightly different names. There we go. So you can see what's happening here. I'm just creating a whole bunch of items, I'm creating 50 of them with a due date which is randomly in last year and a priority which is some random number up to 10 and the text will just be the number to do.
So this will just give us some data which makes life a little bit easier to start playing with things. And so the other reason I wanted to show you this is basically to show you how easy it is to work with the database. So although the database got created automatically, it's very easy for us to edit the database later.
So now that we've made this change to our database, in this case a change to the initial data that's in it, you just have to run a command to tell it to actually make that change in the database. Not surprisingly, the command is update database. And it's quite amazing, if we go back and change this class to add a field or make something nullable or change a data type, and we can then basically, it will automatically create the C# code necessarily to actually change the database so it actually keeps track of what the current class is and what it used to look like and so forth, which I think is quite neat.
Well, it actually, this particular version is, but it actually originally came from Ruby. So the idea of migrations, I don't know if it's first came from Ruby, but that's the most well-known version of it. So now that we've done that, let's try rerunning our API. And you can think about what you would expect to appear, there we go, already done.
Okay, so here's our seeded database. So that is the entire backend, so now we need to start writing our frontend. So we're gonna use Bootstrap and we're gonna use AngularJS, neither of them is installed into Visual Studio by default, not surprisingly. Most systems will have some easy way to install packages.
In Visual Studio, that system is called NuGet, you probably won't be surprised to hear that you use the console here, and you just type install package and the name of the package. So we're gonna need AngularJS, so this is the thing that's gonna handle all of the connecting up that JSON API to our actual web page, so you can actually see what's going on.
And what that does behind the scenes is it downloads it and it installs it into our solution. So you can actually see what that looks like. So you can see that there's, here they are, all appearing now as we watch. So it automatically unpacks it, puts it into the right place, so the scripts are already been placed into scripts for us, and if there was any CSS, input into CSS, it looks like there isn't for this one.
So now we're going to do Bootstrap. There's a GUI for all this as well if you want to use one, but I kind of like typing because I find it a little bit quicker and a little bit more auditable. So now we can check what that looks like, yep, there we go, all the CSS has already been put in here for us, along with any necessary images.
So that's kind of nice, we've got everything downloaded and installed and ready to go. That's right, so jQuery is automatically installed by the web API, when we first said I want to use web API they installed a few things for us, the main one they installed was jQuery. No you don't, in fact it's installed jQuery through the same system, which means that for example if I later use something that requires a higher version of jQuery it will automatically upgrade it and do everything for me.
All that we've done so far is to kind of download those files and put them in the right place. The next thing we have to do is create an index.html that actually does something with them. So let's create an index.html. Now the index.html that Angular expects to see has a very specific format, in fact it's so specific that I've created a ReSharper template for it, so let's do that, ng-index.
So I need to tell it what the name of this application is and what the title will be, Angular.js.tutorial.todo.app and that is my index.html, so basically every index.html for Angular will look exactly the same, the only thing that will look different really is which style sheets and scripts do you stick in here.
ReSharper is specific to Visual Studio but whatever IDE you use will have some kind of insert a template or insert commonly used text or something like that. If it doesn't stick scripts like this into little text documents, you can copy and post them as required, no point typing it again and again or you can just copy and paste it out of my webpage.
As it says here, all you have to do is change the ng-app attribute and the title. So we're now up to talking about some conceptual stuff which is what's going on here because literally this is going to be the start and the end of index.html, we're not going to modify this now.
So what we're instead going to do is we're going to create things called details.html, list.html and so forth and we're going to let Angular figure out how to do all that. So what I'm going to do is slightly weird, I'm going to first of all show you the code, we're not going to really understand what the code is and then I'm going to come back and explain why that code is what it is.
I just want to first give you a sense of what code we need. The first thing we need is we're going to need to create our own JavaScript file which is like where we can put our own code into and in Angular generally that JavaScript file is called app.js so that's why my template already has something referring to app.js.
So let's create that now, app.js. So in app.js there's a very standard thing you need which is you basically have to have this little Angular application constructor so again as you can see this is a very sharp template, it's totally standard code even if it looks slightly hairy at this stage so I need to give it a name and I need to describe basically what's the thing that happens when you go to the root.
You can see this here so we need to do a list. Let's try that again, sorry, gaptodo list and let's have a file list.html. Let me explain what's going on here, this is a bit where in fact this is where I'm going to flick across and start drawing some stuff so what I want to point out is that we have told Angular exactly two things or three things actually, when you go to some path what controller do you use, what template do you use, so there are three things I want to explain what's going on there because that's really what this is all about so this next bit is going to be a bit conceptual.
So the way Angular works is or in fact if you think about it the way your browser works is that your browser has requested index.html or at least we will shortly. And in it there's basically a number of JavaScript libraries referred to and behind the scenes what happens if you refer to a JavaScript library it just takes that code and it runs it, that's what your browser does.
And one of the things in there was the Angular JavaScript and one of the things in there was the JavaScript that we wrote. The other thing you might have noticed is there was something, let's have a look at it in fact, there was something called ng-view and there was also something called ng-app.
All Angular specific stuff starts with ng. What happens as soon as Angular loads and once the whole HTML file is loaded Angular goes back over your HTML and looks to see if it can find something called ng-app and if it does it says okay this is an Angular application, I'm going to create an Angular application called todo-app and I'm going to try and see if anybody has created some JavaScript for that application.
And to do that we have actually created, this is how you tell it, that this code is for that application. So you can see this text here matches this text here. So now the JavaScript and the HTML have been connected together, Angular knows that these two files are designed to work together and so now that it knows that it reads to find out how to configure this application and so it then says okay, in particular I want to know when you go somewhere what code will I be using and how will I be displaying it.
So there are the three pieces here. So you've got index.html which via app.js tells it two things. One is what code should I run for a particular path and what page should I show. This is called the controller and this is called the template. So this will become more clear as we do a few, but anybody who has used MVC before will be very familiar with all of this, basically every MVC framework in the world works pretty much this way.
So let's go back to writing some code. In this case we need to create our controller and we're going to create something which is as basic as possible. Now I'm going to explain exactly what's going on here in a moment, but I've just got a pretty minimal controller which is creating something called test and setting a particular value.
And the second thing I need to do is create something called list.html. So let's do that. And because this is now a template it's going to be inserted into the spot where this says ng-view which means that it already has an html tag, a head tag, a body tag and so forth.
So we can delete everything else and just type what we want. So let's go hello and we're going to now insert something from our JavaScript. So we've got something in JavaScript called test and the way you do that is by putting it in these things called handlebars, double angle brackets.
So this is going to be like, I'm going to explain exactly what's going on in a moment, but I just wanted to show you this really minimum version of tying HTML and JavaScript together. So let's save all that and see what happens when we go to that page. Okay, so that's interesting, right?
So index.html, remember, has only that in it, but Angular then checked app.js, looking to see if it can find something with this same application name, it found it and then recognized that then when you're in the root of this, I should get code from the list controller, HTML from the template and display it.
And then the template says, what should you display? So the really cool thing which we need to understand clearly is what is test and what is dollar scope. So that's the thing that I'm going to explain now. Inside your controller, something is made automatically available and that something is called dollar scope.
It's a JavaScript object with very, very special properties, so very, very special behaviors. The way it works is that anything that's inside dollar scope is automatically bound to the HTML page, so anything that you put inside dollar scope is automatically made available in the HTML and you can then refer to it in the HTML by putting it in those handlebar brackets.
Now, in the HTML, you don't need to say dollar scope dot because this is a very definition of this. It's something that comes out of dollar scope. How neat is it? It's so neat that literally as soon as you change something in the controller, it changes in real time in the page and there's actually two ways of making it appear in the page.
One is by putting it in just regular text inside double angle brackets. The other is by putting it inside any kind of tag and then adding a special attribute called ng-model and in that you can put something which is in dollar scope. I actually want to show you the simplest way that this can possibly work, which is to go into our list dot HTML and actually add an input tag, so something we can type into and in this case, let's actually create this ng-model tag and we're going to call it test.
You can have a think about what this is going to do, you expect. Isn't that amazing? That's really cool, right? What's happened behind the scenes here is that as I typed into this text box, here's one thing that I didn't show you how cool it is, is that this binding between dollar scope and the template is actually two-way.
So in this case, I changed something which had an ng-model defined. Changing that thing caused dollar scope dot that thing to change because that's the very definition of this tag and then there was something else bound to it which therefore changed at the other end. So what this means is that we can now write pretty sophisticated logic in our JavaScript and have it automatically appear in our HTML.
So this binding between dollar scope and the application is where the magic happens. How does it know to put testing into the input tag? The reason is that app.js has been configured with the controller being called list controller. In the list controller, it runs a line that goes dollar scope dot test equals testing.
So dollar scope dot test now equals testing and the ng-model here creates a two-way binding between dollar scope dot test and this input so therefore since it's a two-way, it displays the initial value of dollar scope dot test which then gets overwritten as soon as I type into it.
Exactly. So let's put this to work and actually do something useful, shall we? So in our case, this is meant to be a list. So lists deserve to go in tables. Just seeing if I've got any useful tags for that. So Bootstrap is the thing that's going to make things look half decent and in Bootstrap, you just use normal HTML but you have to give things particular classes to basically say make this look the Bootstrap way.
So I generally have a bunch of templates for Bootstrap to stick in those classes for me. So I'm just going to use the Bootstrap template to set that up for me. So in our particular case, we're going to need text due date and priority. So we'll have text - in fact, we probably don't want to call it or just say it to do due - let's put that second, priority and then due - they're just the headers, okay?
And now we need the actual data. Now we need this row to repeat enough times one for each todo item. At this stage, we don't have any todo items, so we need to find some way of retrieving them. So let's just see what this looks like at this point.
Okay, so at this point, all we've got is just some headers. So we now need to write some JavaScript, which is actually going to go into our web application server to that web API, that JSON API, and retrieve a list for us. Angular already has something which can do all the standard CRUD operations for us, and it's called $resource.
And to create one of these things, there's, again, basically a standard bit of boilerplate that you have to type, which therefore means that I already have a template for it. And it's that. So as you can see, all I did was basically put the name of the application. In this case, the path is api/todo.
We can check that by checking our controller, yep, api/todo. So this basically says any time we want to interact with our API, go to that path. And let me show you how easy this is. Now I want to have a list of my todos available to my HTML. Or I'm going to have to put the list of those HTMLs inside Dollascope.
That's the definition of what Dollascope's all about, right? So Dollascope.todos equals, OK, we've got to set it equal to the result of going to my server and pulling down a list of todos. I can use this resource I just created, which is called todo. And it has a query method.
How do I know it has a query method? This is where I want to show you the Angular documentation. It's really great, the Angular documentation. What does $resource do for us? It creates something with this particular API, and the thing to do a get is called query. So that's what I'm going to call this query.
And so that's going to do exactly the same as just typing /api/todo. So that should create a Dollascope.todos which should contain all of our todos which has been sucked in from the web server over that API. The only other thing I need to do then is loop through each of those and stick them into my JavaScript.
And it so happens that Angular already has, not surprisingly, a way to loop through something and stick it into HTML, and it is called ng-repeat. And what this does is everything inside that ng-repeat is going to get repeated for each item in todos. So we can now simply use that angle bracket notation like this.
So we've got todo, then priority, then due date. Let's check it out, shall we? Todo is not defined. I'm actually really glad this error happened because this is tricky and it's really neat. This list here of parameters that's being sent into our controller, it's really quite amazing. You can actually put any parameters you like here in any order as long as they have the right names, and Angular will automatically send them to your controller for you.
Behind the scenes it's using something called dependency injection which some of you may have come across in software engineering. In our case we want to make sure that this todo object is available in this controller, which means we actually have to pass it in. And just the fact that it has the same name as the thing we created up here means that Angular is going to automatically create it for us and pass it to our controller.
So that's just something you basically have to know. I don't think you need to be on top of dependency injection in detail. All you really need to know is that, and it's something maybe in a later tutorial I go into more detail, there's basically a concept of like in a lot of languages you have something called global variables which allow you to access a particular variable everywhere in your program.
They're considered bad software engineering practice because you can end up with multiple libraries defining the same global variable. This is a way of having something that's like global variables but you specifically say where you want them. So in this case I said any time that somebody says that they want something called todo this is how you're going to construct it and then this is how I say I want something called todo.
That's basically what dependency injection does. Most importantly though we now have a working list here. The only other thing I want to do in the last three minutes is make this look a little bit better because currently that's a rather ugly way to display a date. One of the handy things inside Angular is something called filters.
And filters are basically ways that we can change the way that something is displayed. There is a date filter which is going to take a date and display it in a particular way. The way that you use a filter in your HTML is by simply, you think of it as piping it to it.
So we're going to use a filter called date and in particular date takes an argument and I want to use medium date. There we go. So that's basically the end of this part I think because this has really contained a lot of the concepts that we've needed. We've gone from end to end, well from end to middle perhaps which is starting from nothing.
We've created a database. We've created a REST API. We've created a controller. We've created a template and that took us an hour although I think if I wasn't explaining things hopefully we could have done the whole thing end to end in one hour. That's the theory anyway.