fastai v2 walk-thru #7
Chapters
0:09:53 Delegates
13:8 Data Loader
28:13 Data Blocks
28:41 Datablocks
36:26 Data Block
39:8 Merge Transforms
40:1 Data Augmentation
40:23 Create a Data Source
41:58 Examples
42:53 Multi-Label Classification
47:16 Inheritance
47:25 Static Method
51:0 Segmentation
Transcript
Hi, can you see me and hear me okay? Test, test, one, two. Okay, sorry for the slight delay, where did we get to last time? We looked at data source, did we finish looking at data source? But also, did anybody have any questions about yesterday? No, it doesn't look like we quite finished data source.
Let's see what the notes say, okay, so we've done some, okay, we looked at filter, okay. So all right, so we were looking at data source. Yes, that's right, we looked at subsets. So I think the only bit we haven't looked at was data bunch. So if we look at the tests, yes, I remember doing that test, yeah, okay, so I don't think we did this one.
So one of the interesting things, oh, my video's not on, no, it's not, why's that? Yes, Michael, that's because it's trying to use a device that's not there. And then my computer's going really slowly. Okay. Okay, can you see me now? All right, so one of the interesting things about data source is that the input could be, instead of being a list or an L or whatever, it can be a data frame or a NumPy array.
And one of the nice things is that it will use the pandas or NumPy or whatever kind of accelerated indexing methods to index into that to grab the training set and the test set. So this is kind of a test that that's working correctly. And so here's an example of a transform, which should grab the first column.
And then this subset is going to be the training set. And in this case, the data source, we haven't passed any filters into it. So this is going to be exactly the same as the unsubsetted version. So that's all that test's doing. So here's how filters work, they don't have to be tensors, but here's the example with a tensor and a list just to show you.
So here we've got two filters and we can check the zeroth subset and the first subset. Yeah, so that 15 second lag, I think is, that's just what YouTube does. It has a super low latency version, but if you choose a super low latency version, I think that significantly impacts the quality.
So I think the 15 second lag is probably the best compromise. Just a reminder that the reason that we get things back as tuples is because that's what we expect to see for a data set or a data loader mini batch is that we do get tuples of x and y or even if it's just an x, it'll be a tuple of an x, so it keeps things more consistent that way.
So here's a test of adding a filter to a transform, which we talked about last time. So this transform will only be applied to subset one, which in this case will be these ones, so it encodes x times two. So if we start with range naught through four, then the training sets are going to be one comma two, but the validation set will be doubled because it's the filter number one.
So that's the example of the thing we're talking about if using filters. So then data bunch is, as the name suggests, just something that creates a data bunch. So a data bunch to remind you is data bunch is this tiny, tiny, tiny thing, so it's just something which basically has a train deal and a valid deal.
So to create one, we just need to pass some data loaders into init for data bunch, that's how we create it. So here you can see here is the data bunch constructor, and we have to pass in a bunch of data loaders. And this is something still going to just edit today, which is it won't necessarily be of type data loader, it could be some subclass of data loader.
So deal class default is transform deal, so this is going to create a transform deal with subset I, because we're looping through all of the eyes of all of the subsets. And then for each one, there's going to be some batch size and some shuffle and some drop last, and they all just depend on whether or not it's the training or validation set as to what's the appropriate value there.
Okay, so that's that, that is data source. So now let's put that all together again, look back at data source in O8. So okay, so the delegates is something that we're kind of working on at the moment, it's not quite working the way we want, but basically, normally, we just put delegates at the very top of a class like this.
And that means that the any star star quags in the init of that class will be documented in the signature as being the super classes init method, but we don't have to delegate to the super class init, we can specifically say what we're delegating to. So in this case, the quags that are being passed through here, ended up being passed to the data loader constructor.
So this says this is delegating to the data loader constructor. So if we look at the documentation, so let's run some of these to see this in action. So if we go data source.dataBunch, and you can see here's quags, and if I hit shift tab, then I don't see quags, I see all of the keyword arguments for data loader.
And that's because that's what that delegates did, it said use the quags from this method for the signature. Okay, thanks for the question. So if we now look at the data source version here, just to remind you of what we have, we're looking at the pets data set, and so the items are lists of paths to pictures of pets, and data firms are these lists of PIO image.create, and there's a regex laborer in the second pipeline and categorized in the second pipeline.
So when we pass those to data source, we can also pass in our splits, then we can go pets.subset1 to grab the validation set. And so this is the zero thing in that data set, which is of course, an image, that's the shape and some label, categorized label. So we can also use valid, and we can use decode, and we can use show.
And so you can see show is decoding the int label to create an actual proper label. So in order to create many batches, we need to create a data loader, that's here. And to do that, we also need to resize all the images to the same size and turn them into tenses.
And we need to put everything onto CUDA and convert byte to flow tenses for the images. So when we create the transform data loader, let's do the training set, some batch size, and then here the data loader transforms. And so then we can grab a batch, and we can make sure that the lengths and shapes are right and that it's actually on CUDA if we asked it to be.
And that now gives us something we can do a .showbatch done. We could have also done this by using databatch, databunch rather, the source.databunch, pets.train, pets.databunch, so that's going to want batch size, oh, it's two batch sizes, that's a mistake. And let's grab all that. Okay, so let's see what that's given us, databunch.
So that should have a train.do, train.do, oopsie-daisy, so it is, and so we could then grab a batch of that, same idea. Okay, so I guess we could even say showbatch, there we are. Okay, so questions, maybe do imagery sizer is pre-processing? So generally, you don't, well, let's try and give you a complete answer to that, Harami.
Generally speaking, in the fast data courses, we don't do it that way because normally part of the resizing is data augmentation. So the default data augmentation for ImageNet, for example, is we kind of pick some, oopsie-daisy, we pick some random cropped sub-area of the image and we kind of like zoom into that.
So that's like what we, that's kind of what, that's normally how we resize. So for the training, the resizing is kind of cropping at the same time. So that's why we don't generally resize as pre-processing. Having said that, if your initial images are really, really big, and if you want to use the full size of them, then you may want to do some pre-processing resizing.
Okay, so after batch and after item, I'm glad you asked, they're the thing I was going to look at in more detail now, which is to take a deeper dive into how Transform Data Loader works. We've already kind of seen it a little bit, but we're probably in a good position to look at it more closely.
And yeah, you can think of them as callbacks. Looking at O1C Data Loader is actually a fun place to study because it's a super interesting notebook. You might remember it's got this really annoying fake loader thing, which you shouldn't worry about too much because it's just working around some problems with the design of PyTorch's Data Loader.
But once you get past that, to get to the Data Loader itself, we're doing a lot of stuff in a very nice way. So basically what happens is, let's see what happens when we iterate. So what's going to happen when we iterate is it's going to create some kind of loader.
And so _loaders specifically is a list of the multiprocessing Data Loader and the single process Data Loader from PyTorch. So we'll generally be using the multiprocessing Data Loader. So it's going to grab a multiprocessing Data Loader, and it's going to yield a batch from that. Actually what it iterates, it actually calls sampler on our Data Loader class to grab a sample of IDs and then batches to create batches from those IDs.
So the key thing to look at is create batches. This is actually what the Data Loader is using, is create batches. So create batches, most of the time there's going to be a data set that we're creating a Data Loader over. So we create an iterator over the data set, and we pop that into self.it.
And then we grab each of the indexes that we are interested in. So this is the indexes of our sample, and we map do item over that. Do item calls create item, and then after item, create item, assuming that the sample is not none, simply grabs the appropriate indexed item from a data set.
So that's all create item does. And then after item, by default after item equals no up, it does nothing at all. But we have this funx quags thing, which is a thing where it looks for methods, and you'll see that after item is one of the things listed here in funx quags.
And what that means is that when we pass in quags, it's going to see if you've passed in something called after item, and it's going to replace our after the item method with a thing you passed in. So in other words, we can pass in after item, and it will then be called the thing we passed in will be called at this point.
So yeah, it is basically a callback. But actually, notice that all of these things, all these things that are listed are all replaceable. So it's kind of like a bit more powerful than normal callbacks, because you can easily replace anything inside the data loader with whatever you like. But these things with after or before in their name, the things which actually default to no up are very easy to replace, because there's no functionality currently there.
So it doesn't matter. Like, you can do anything you like. So after item, then, is the thing that is going to get called immediately after we grab one thing from the data set. And so that's what happens here. So we map that over each sample index. And then, assuming that you have-- so that if you haven't got a batch size set, so batch size is none, then we're done.
There's nothing to do. You haven't asked for batches. But if you have asked for batches, which you normally have, then we're going to map do batch over the result we just got. And first, we chunk it into batches. And one of the nice things about this code is the whole thing's done using generators and maps and lazy.
So it's a nice example of code to learn how to do that in Python. Anyway, so do batch is going to call before batch, and then create batch, and then retain. This is just the thing that keeps the same type. And then finally, eventually, after batch. So again, before batch, by default does nothing at all.
After batch, by default does nothing at all. And create batch, by default simply calls collate. So that's the thing that just concatenates everything into a single tensor. OK, so it's amazing how little code there is here, and how little it does. But we end up with something that's super extensible, because we can poke into any of these points to change or add behavior.
One of the things that I'm talking about is that it's possible we might change the names of these things like after item and before batch and stuff. They're technically accurate. They're kind of like once you understand how the data loader works, they make perfect sense. But we may change them to be names, which makes sense even if you don't know how the data loader works.
So anyway, so that's something we're thinking about. So then tofmdl, which is in O5, now I think about it, is a pretty thin subclass of data loader. And as the name suggests-- so here it is. As the name suggests, it is a data loader. But the key thing we do is that for each of these three callbacks, we loop through those and we replace them with pipelines, transform pipelines.
So that means that a tofmdl data loader also has decode, decode batch, and show batch. So that's the key difference there. The other thing it needs to know how to do is that if you-- when you call decode, you're going to be passing in just a plain PyTorch tensor.
Probably it's not going to have any type like a tensor image or a tensor bounding box or whatever. The loader has to know what data types to convert it into. And what it actually does is it has this method called retainDL, which is the first thing that it does here.
And that's the method that adds the types that it needs. So the-- what we do is we basically just run one mini batch, a small mini batch, to find out what types it creates. And we save those types. And this little bit of code is actually super cute. If you want to look at some cute code, check this out and see if you can figure out how it's working, because it's-- I think it's very nice.
OK. So that's that. So now you can see why we have these data set image transforms and these data loader transforms and what they go here. So these data set image transforms, imagerySizer, that's something that operates on-- let's go back and have a look at it, because we created it just up here.
It's something that operates on a pillow image. So that has to be run before it's being collated into a mini batch, but after it's being grabbed from the data set. So that's why it's-- that is in the after item transforms, because it's before it's being collated into a mini batch.
On the other hand, CUDA and byte to float tensor are going to run much faster if it's run on a whole mini batch at a time. So after batch is the thing that happens after it's all being collated, and so that's why those ones are here. OK. So let's now look at data blocks.
OK. So data blocks is down in 50, because we-- here we go, because it has to use stuff from vision and text and so forth in order to create all those different types of data blocks. And let's take a look at an example first. So here's an example of MNIST.
So if you remember what data blocks basically have to do, there has to be some way to say which files, for example, are you working with, some way to say how to split it from a validation set and training set, and some way to label. So here are each of those things.
We kind of need something else, though, as well, which is we need to know, for your Xs, what types are you going to be creating for your Xs? And for your Ys, what types are you going to be creating for your Ys? Why is that? Well, it wants to create those types, because these types, as we'll see, have information about what are all the transforms that you would generally expect to have to use to create and use that type.
So you can see there isn't actually anything here that says open an image. This is just list the images on the disk, list the file names. But this tuple of types is the thing where it's going to call PIL image black and white dot create on the file name to create my Xs, and it's going to call category to create my Ys.
And in the Y case, because there's a get Y to find, first of all, it will label it with the parent labeler. So if we have a look, so here's our category class. And let me try to remember how this works. What about PIL image PW? I just want to remember how to find my way around this bit.
So PIL image PW. So, these types are defined in 07 Vision Core. Yes, so you can see PIL image PW. PW is a PIL image. It's got no other methods. So it's going to be calling the create method for us, but when it calls the create method, it's going to use open args to figure out what arguments to pass to the create method, which in the case of PIL image PW is mode L.
That's the black and white mode for pillow. But there's another thing in here that's interesting, which is that PIL base, which this inherits from, has a thing called default DL transforms. And this says if you, in the Databox API, when you use this type, it's going to automatically add this transform to our pipeline.
So here's another example. If you're working with point data, it adds this to your DS transform pipeline. Pointing boxes, there are different transforms that are added to those. So the key thing here is that these types do two things, at least two things. The first is they say how to actually create the, how to actually create the objects that we're trying to build, but they also say what default transforms to add to our pipeline.
And so that's why when we then say, so we can take a data block object and we can create it, and then we can call data source, passing in the thing that will eventually make its worth way to get item source. So this is the path to MNIST. And this then allows us, as you can see, to use it in the usual way.
And because the Databox API, as we'll see, uses funx quags, that means that we can, instead of inheriting from data block, we can equally well just construct a data block. And if you construct a data block, then you have to pass in the types like this. And then here are the three things, again, that we were overriding before.
So it's doing exactly the same thing as this one. So a lot of the time, this one is going to be a bit shorter and easier version if you don't kind of need state. So let's look at the data block class. As you can see, it's very short. So as we discussed, it has a funx quags decorator.
And that means it needs to look to see what the underscore methods are. So here's the list of methods that you can pass in to have replaced by your code. Then the other thing that you're going to pass in are the types. So then what we're going to do is we're going to be creating three different sets of transforms.
And in data block, we're giving them different names to what we've called them elsewhere. But again, I don't know if this is what the names are going to end up being, but basically what's going to happen is, as you can see, after item is DS transforms, which kind of makes sense, right?
Because the things that happen after you pull something out of a data set is after item. So they're kind of the data set transforms, whereas the things that happen after you collate. So after batch, they're the DL transforms. So they're those two. And so we have for a particular data block subclass, there's going to be some default data set transforms and some default data loader transforms.
The data set transforms, you're pretty much always going to want to tensor, data loader transforms, pretty much always going to want CUDA. And then we're going to grab from our types that we passed in that default DS transforms and default DL transforms attributes that we saw. OK, so there's something kind of interesting, though, which is then later on when you try to create your data bunch, you know, you might pass in your own data set transforms and data loader transforms.
And so we have to merge them together with the defaults. And so that means if you pass in a transform that's already there, we don't want it to be there twice in particular. So there's a little function here called merge transforms, which, as you can see, basically removes duplicate transforms, so transforms of the same type, which is a little bit awkward, but it works OK.
So this is why things like order is important. Remember, there's that order attribute. In pipeline, we use the order attribute to sort the transforms. So like you can have transforms defined in different places. They can be defined in the types, in the defaults and the types, or you could be passing them in directly when you call data source, sorry, a data bunch or data source.
And so we need to bring them all together in a list and make sure that list is in an order that makes sense. So yeah, so data augmentation, we haven't looked at yet, but they are just other transforms. So generally, you would pass them into the data bunch method, and we don't have any-- there's no augmentations that are done by default, so you have to pass them in.
So if you ask for a data bunch, then first of all, it's going to create a data source. So self.source, in this case, will be like the path to MNIST, for example. So we would then call that get items function that you defined. And if you didn't define one, then just do nothing to turn the source into a list of items.
And then if you have a splitter, then we create the splits from it. And if there's a get x and a get y, then call those-- well, actually, don't call those, just store those, I should say, as functions. So they're going to be a labeling functions. OK, if you didn't pass in any type transforms, then use the defaults.
And so then we can create a data source, passing in our items and our transforms. And so that gives us our data source. And then we'll create our data set transforms and data loader transforms and turn our data source into a data bunch using the method we just saw.
OK, so that's data blocks. So the best way to understand it is through the examples. So yeah, have a look at the subclassing example, have a look at the function version example. And so pets, so the types of pets are going to be an image in a category. Same get items, a random splitter, a regex labeler, forget why.
And there we go. And in this case, you can see here we are actually doing some data augmentation. So aug transforms is a function of simulator, which gives us-- it's basically the same as get transforms was in version one, but now transforms is a much more general concept in version two.
So these are specifically augmentation transforms. OK, and multi-label classification. So multi-label classification is interesting because this time we-- this is Planet. It uses a CSV. So yeah, Kevin, hopefully that's answered your question on augmentations. Let me know if it didn't. So Planet, we create a data frame from the CSV.
And so when we call Planet.betaBunch, we're going to be passing in the NumPy array version of that data frame, so df.values in this case. And our augmentation here, as you can see, it has some standard Planet appropriate augmentations, including flipvert equals true. And so what happens here? So we pass in this.
This is a NumPy array when we call dot values. And so get x is going to grab just x0. And this will just grab x1 and split it because this is a NumPy array. So each row of this will contain-- the first item will be the file name and the second item will be the value.
So that's one way of doing Planet, which is mildly clunky. It works. Here's another way of doing-- and the other thing about this way is it's kind of-- I don't know. It's like doing this NumPy array thing is kind of weird. This is a more elegant way, I think, where we're actually passing in the data frame rather than converting it into a NumPy array first.
So this time, we're doing something a little bit different, which is in get items. So before for get items, there was nothing at all, right? So we just used the NumPy array directly. This time for get items, we're using this function, which returns a tuple. And the first thing in the tuple is a pandas expression that works in an entire pandas column to turn that column into a list of file names.
And then this is another pandas expression that works on a complete column, the tags column, to create the labels. So one of the things that we skipped over when we looked at data blocks is that when we call get items, if it returns a tuple, then what we do is we zip together all of the items in that tuple.
So in this case, we've returned a column of file names and a column of labels. And data sets are meant to return a single file name label pair. So that's why this zips them together. And so then the labelers will just grab the appropriate thing from each of those lists.
So this is kind of a nice-- as you can see, you end up with very nice, neat code. It's also super fast because it's all operating in the kind of the pandas fast C code version of things. So there's a handy trick. And then here's the same thing again, but using inheritance instead.
Here's a neat trick. We've only ever seen static method use as a decorator before, but you can actually just use it like everything. You can use it as a function to turn this into a static method. Lots and lots of versions of this, as you can see. Here's another one where we're pissing in the data frame.
And we can just have get x, grab this column, grab-- get y, this column. Maybe this is kind of actually the-- maybe this is the best version. It's kind of both fast and fairly obvious what's going on. So there's lots of ways of doing things. So Kevin mapped is simply the version of map as a method inside L.
And then map is just the standard map function in Python, which you should Google if you don't know about it. It's got nothing to do with parallelization. It's just a way of creating a lazy generator in Python. And it's very fundamental to how we do things in version 2.
So I mean, end users don't really need to understand it. But if you want to understand the version 2 code, then you should definitely do a deep dive into map. And looking at how the version 2 data loader works would be a good place to get a very deep dive into that because it's all doing lazy mapping.
It's basically a functional style. So map is something that comes up in functional programming a lot. So a lot of the code in version 2 is of a more functional style. I mean, here's a short version. If I create something like that, and then I say map some function like negative, so that's just the negative function over that, it returns-- oh, something weird-- it returns a map.
And basically, that says this is a lazy generator, which won't be calculated until I print it or turn it into a list or something. So I can just say list. And there you go. So you can see it's mapped this function over my list. But it won't do it until you actually finally need it.
So if we go t2 equals that, and then we say t3 equals map. Maybe lambda o plus 100 over t2. So now t3 is, again, some map that I could force it to get it calculated like so. And as you can see, it's doing each of those functions in turn.
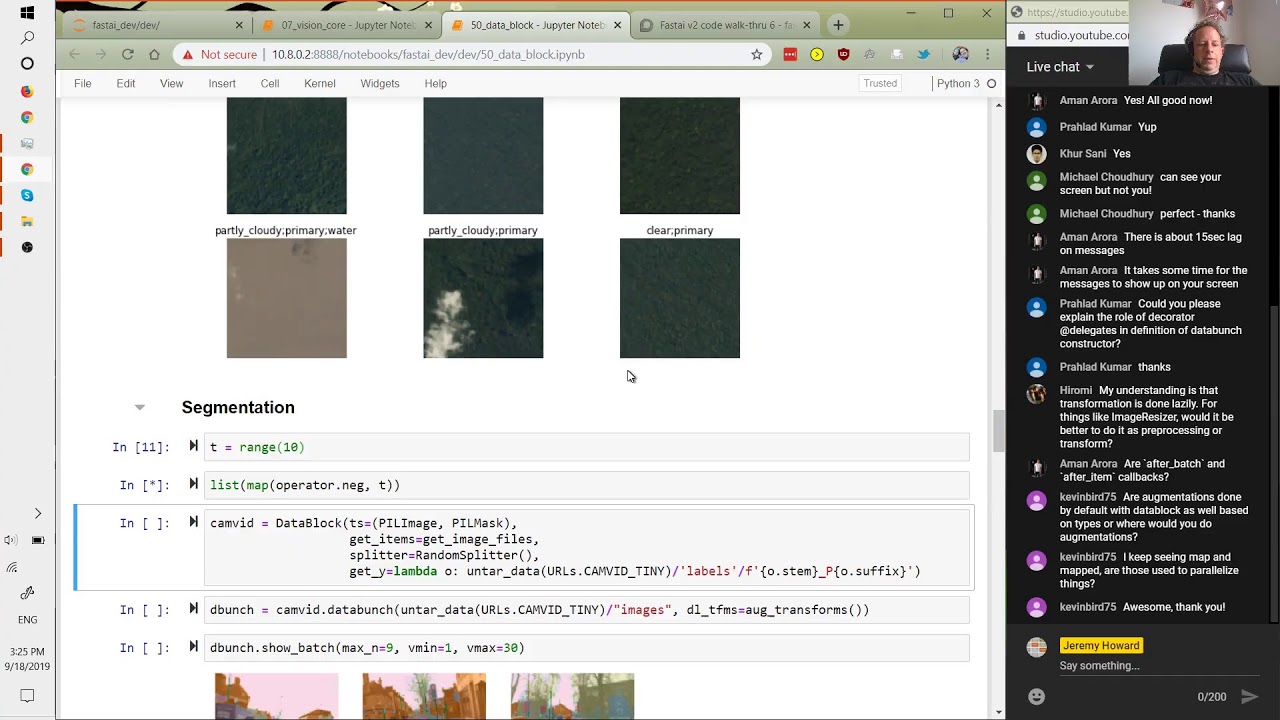
So this is a really nice way to work with data sets and data loaders and stuff like that. You can just add more and more processing to them lazily in this way. So then segmentation. I don't think there's anything interesting there that's any different. I'm not going to go into the details of how points and bounding boxes work.
But for those of you that are interested in object detection, for example, please do check it out in the code and ask us any questions you have. Because although there's no new concepts in it, the way that this works so neatly, I think, is super, super nice. And if you have questions or suggestions, I would love to hear about them.
And then I think what we might do next time is we will look at tabular data. So let's do that tomorrow. Thanks, everybody. Hopefully that was useful. See you.